
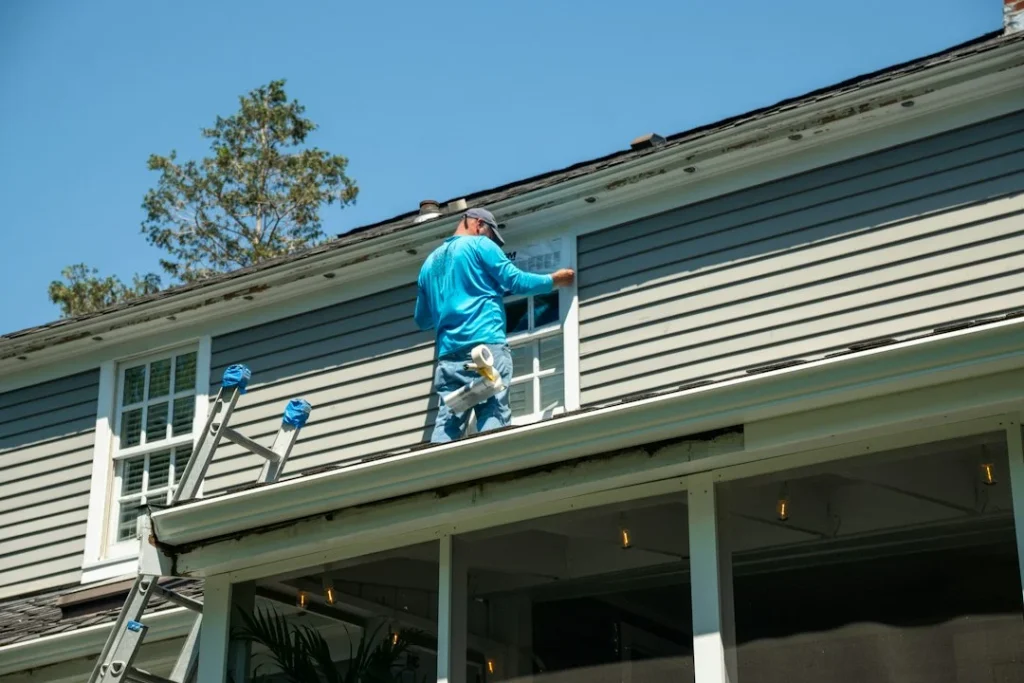
Window installation costs range from about $450 for a small bedroom unit to over $5,000 for a basement egress window, driven by size, glass type, and local codes.
Window Installation Pricing Explained Room by Room
Not every window in your house costs the same to replace, and homeowners are often surprised when a basement egress window quotes five times higher than the bedroom unit next to it. This guide walks through what actually drives those differences so you can plan a realistic budget. Ready to get exact numbers for your home? Request a free installation estimate today.
Why Homeowners Choose Our Installation Team
Pricing transparency is the first thing that separates a good window contractor from a frustrating one, and it’s where we’ve built our process. Every estimate we issue breaks cost out by individual opening rather than handing over a single lump-sum number for the whole house. When a client asks why their kitchen window costs more than the bedroom down the hall, we can point to the exact line item — a wider frame, a different glass package, or extra flashing work — instead of shrugging.
Measured Twice Before We Quote Once
We send a field estimator to physically measure every window opening in the home before pricing anything. Rough openings settle over time, older homes often have out-of-square frames, and a quote based on “standard size” assumptions tends to balloon once crews show up with the wrong unit. Our in-person measurement process catches those discrepancies up front, which is also why our change-order rate on signed contracts runs well below the industry norm we’ve seen quoted by competitors in our market.
Installers Who Specialize, Not Generalize
Our installation crews are split by project type. The same technicians who handle a straightforward bedroom or living room swap-out are not the ones we send for a basement egress job, which involves foundation cutting, window well installation, and coordination with local building inspectors. Egress projects get assigned to crews who’ve logged dozens of these installs and understand the permit sequencing involved — something we detail step by step in our breakdown of a basement egress installation timeline, because that project type simply moves differently than a standard window swap.
Why Glass Packages Change by Room Instead of Getting Upsold
A lot of contractors quote the same triple-pane, low-E, argon-filled package for every opening in the house regardless of whether it makes sense. We don’t. A north-facing bedroom window with minimal sun exposure doesn’t need the same solar-control glass as a west-facing kitchen window that bakes in afternoon light for four hours a day. Our estimators recommend glass by orientation and room use, which keeps unnecessary upgrade costs out of bedrooms and hallways while steering the budget toward where it actually improves comfort — kitchens, sunrooms, and south- or west-facing living spaces.
Egress Compliance Handled In-House
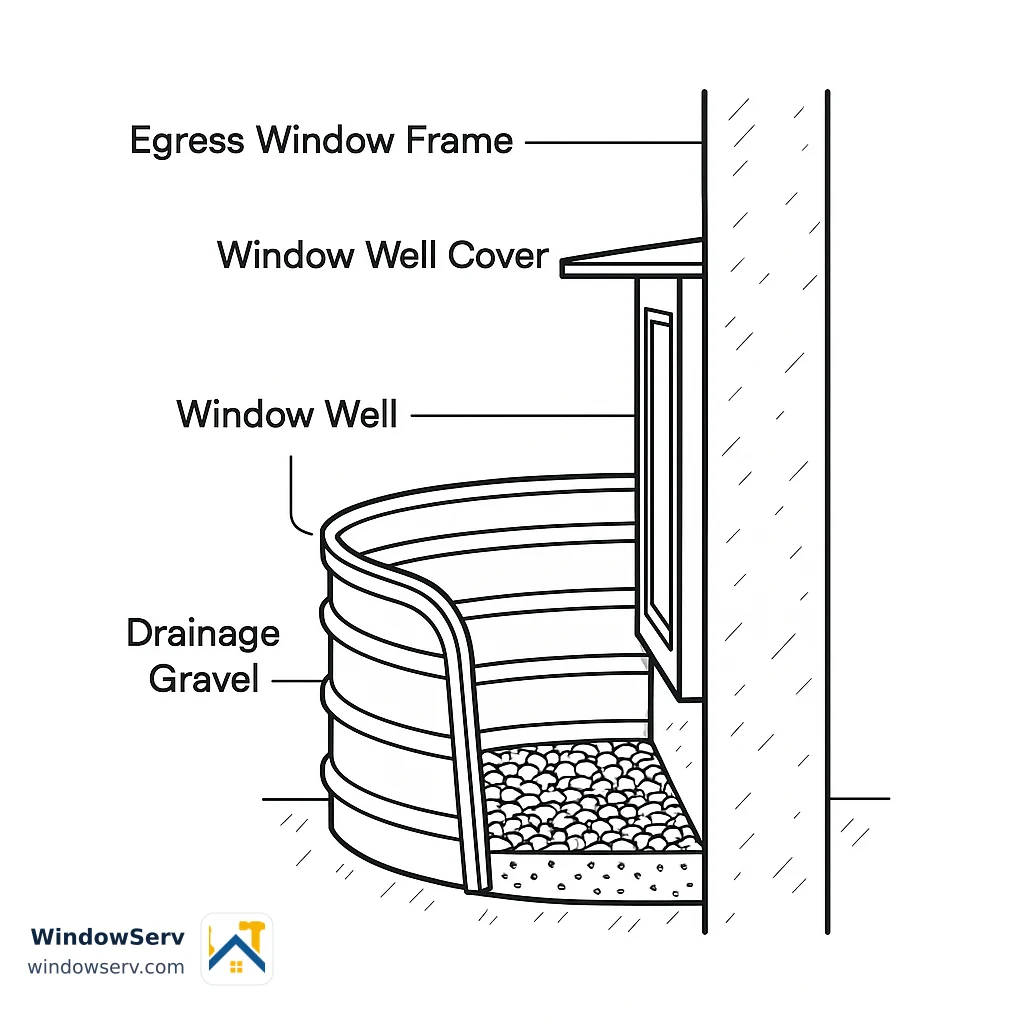
Basement egress windows carry code requirements most homeowners don’t anticipate — minimum net clear opening, maximum sill height above the floor, and a compliant window well with proper drainage. We pull the permit, coordinate the inspection, and build the window well to drain correctly the first time, because a poorly graded or undersized well is one of the most common callbacks we see on egress jobs that other contractors installed. If you’ve already had an egress window put in and are dealing with a wet or flooding well, our guide on fixing egress window well drainage covers the most common causes and corrections.
Warranty Terms We Put in Writing
Every installation includes a written warranty covering both the window unit (per manufacturer terms, typically 10 to 20 years depending on the product line) and our own labor and seal workmanship for a minimum of 5 years. That labor warranty matters more than people realize — a failed seal or an improperly flashed frame is almost always an installation defect, not a product defect, and plenty of contractors quietly let that distinction work in their favor when a customer calls back. Ours doesn’t.
One Crew, Start to Finish
For whole-house replacement projects, the same lead installer stays on the job from the first window to the last, rather than rotating crews through different rooms. That continuity matters on multi-room projects where bedroom, kitchen, bathroom, and basement openings each have different specs — it reduces the odds of a mismatched glass package or wrong-size unit showing up on install day. Our full-service window installation process covers everything from initial measurement through final trim work and cleanup, so homeowners aren’t coordinating separate trades for framing, insulation, and interior finishing.
Local Knowledge That Avoids Delays
Permit requirements, egress codes, and inspection scheduling vary by municipality, and a contractor unfamiliar with local building departments can add weeks to a project waiting on paperwork. Our estimators and project coordinators work within the same handful of jurisdictions regularly enough to know typical inspection turnaround times and common rejection reasons, which keeps egress and structural projects moving instead of stalling in a permit queue.

Typical installed cost per window, by room
| Room Type | Typical Cost Range |
|---|---|
| Bedroom | $450 – $900 |
| Kitchen | $600 – $1,500 |
| Bathroom | $500 – $1,100 |
| Basement Egress | $2,500 – $5,500 |
Bedroom windows run cheapest because of standard sizing and basic glass. Kitchens cost more due to larger or specialty-shaped openings over sinks and counters. Bathrooms need moisture-resistant glazing and often obscure glass. Basement egress windows cost the most because they require foundation cutting, a code-compliant window well, and a permit inspection. For a deeper breakdown of every line item, see our companion guide on window installation costs by room type.
Reviewed by Marcus Feldman, Lead Estimator at WindowServ
Marcus has spent 14 years in residential window and door installation, including nine years specializing in egress and structural window projects. He is NFRC-certified for energy performance labeling and has personally estimated and overseen more than 1,200 residential installation projects across single-room replacements and full-house renovations. Marcus trains WindowServ’s estimating team on code requirements for egress openings and reviews every basement project quote before it goes out to a client, which is why his field notes form the basis of the cost breakdowns in this article.
What Each Room Actually Costs and Why
Window pricing isn’t driven by brand alone. The bigger factors are opening size, glass specification, and in some rooms, code-mandated features that have nothing to do with aesthetics. Here’s how those factors break down across the rooms we quote most often.
| Room Type | Typical Size Range | Common Glass Spec | Installed Cost Range | Primary Cost Driver |
|---|---|---|---|---|
| Bedroom | 24″x36″ to 36″x60″ | Double-pane, low-E | $450 – $900 | Standard sizing keeps labor and material costs predictable |
| Kitchen | 30″x40″ to 48″x60″ (often over sink) | Double or triple-pane, tempered near counters | $600 – $1,500 | Larger openings, tempered glass near water sources, sometimes custom shapes above cabinetry |
| Bathroom | 24″x30″ to 30″x48″ | Obscure or frosted glass, moisture-resistant frame | $500 – $1,100 | Privacy glass and added moisture sealing around tub/shower areas |
| Living Room / Picture Window | 48″x60″ and larger | Triple-pane, solar control coating | $900 – $2,800 | Larger glass area, heavier frame support, often requires two installers |
| Basement Egress | 20″x24″ minimum net clear opening | Tempered, impact-rated | $2,500 – $5,500 | Foundation cutting, window well construction, permit and inspection requirements |
Bedroom Windows
Bedrooms are usually the least expensive room to re-glaze because the openings tend to follow standard manufacturer sizing, and there’s rarely a structural or code complication involved. A basic double-pane, low-E unit covers most bedroom needs unless the room faces direct afternoon sun, in which case upgrading to a solar-control coating adds modest cost but noticeably improves comfort.
Kitchen Windows
Kitchens push costs higher for a few concrete reasons. The window over a sink is frequently wider than a standard bedroom unit, and building code in most jurisdictions requires tempered safety glass within a set distance of a water source or counter edge. Kitchens also sometimes involve a specialty shape — a garden window or a slider above a built-in bench — which adds fabrication time beyond a standard rectangular unit.
Bathroom Windows
Bathroom windows cost more per square foot than bedrooms despite usually being smaller, because moisture exposure demands better-sealed frames and privacy glass. Obscure or frosted glass runs a modest premium over clear glass, and the frame material needs a more robust moisture barrier where it meets drywall or tile to prevent rot over time.
Basement Egress Windows
Egress windows sit in a different category entirely. Code requires a minimum net clear opening (commonly 20 inches by 24 inches, with at least 5.7 square feet of clear opening depending on local amendments), a sill height no more than 44 inches above the finished floor, and a compliant window well if the window sits below grade. That means the job isn’t just swapping a unit — it typically involves cutting the foundation wall, installing a window well with proper drainage, pulling a permit, and passing inspection. Our week-by-week breakdown of what an egress installation project actually involves walks through why these projects run two to four weeks compared to a single-day bedroom swap.
Why Whole-House Quotes Vary So Much
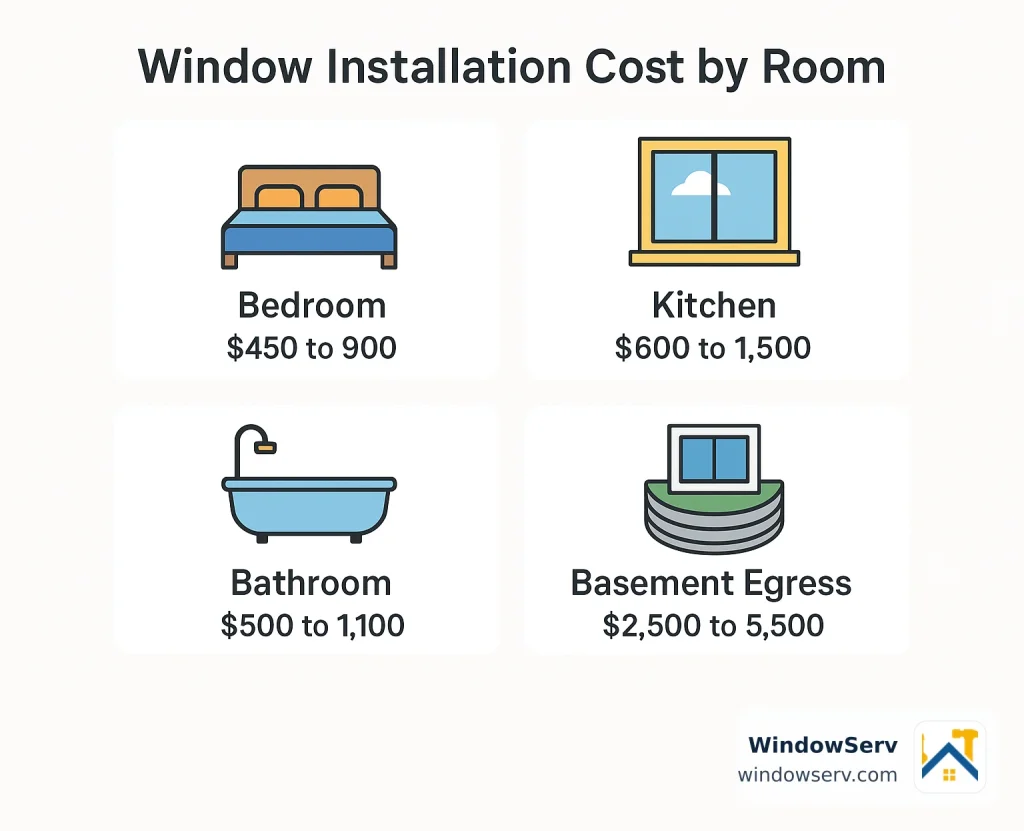
When homeowners get a single number for “whole-house window replacement,” that figure is really an average across very different room types. A 10-window house with six bedrooms, two bathrooms, one kitchen, and one egress basement window will land very differently than a house with ten similarly sized bedroom-style windows, even if the total window count is identical. Asking any contractor for a room-by-room breakdown rather than one bundled number is the single best way to catch whether a quote matches your home’s actual mix of openings.
Should You Install Any of These Yourself
Window installation sits in a gray zone for experienced DIYers — a single bedroom swap in a standard framed opening is within reach for someone comfortable with basic carpentry, but several of the room types covered above carry risks or code requirements that make professional installation the only realistic option.
| Factor | DIY May Be Reasonable | Hire a Professional |
|---|---|---|
| Opening type | Standard rectangular, same-size replacement | Any resize, reshape, or structural opening |
| Room | Bedroom, low-traffic hallway | Kitchen, bathroom, basement egress, large picture windows |
| Glass requirements | Basic double-pane, no code-mandated tempering | Tempered glass near water sources, obscure glass, solar coatings |
| Permits involved | None required | Egress, structural, or any opening-size change |
| Tools needed | Basic hand tools, caulk gun, level | Foundation cutting equipment, structural shoring, inspection coordination |
| Risk if done wrong | Minor drafts, cosmetic gaps | Water intrusion, code violation, failed home inspection on resale |
When DIY Genuinely Makes Sense
A same-size bedroom window replacement, where the new unit matches the existing rough opening exactly and no glass code changes apply, is the most realistic DIY scenario. If you’re simply swapping an old single-pane unit for a new double-pane unit of identical dimensions, the job mostly comes down to removing the old sash, dry-fitting the new unit, shimming it level and square, and sealing the exterior with proper flashing tape and caulk. Budget a full day for your first window and expect subsequent ones to go faster once you’ve worked through the process once.
That said, even this “simple” scenario has a failure point worth flagging: improper flashing is the single most common cause of water intrusion behind a newly installed window, and it’s invisible until drywall starts showing moisture damage months later. If you’re not confident reading a window’s flashing instructions and following manufacturer sequencing exactly, that’s a sign to call a professional even for a basic swap.
Where DIY Stops Being a Reasonable Option
Kitchen and bathroom windows cross into professional territory the moment code-mandated tempered or obscure glass is involved, since getting the glass spec wrong can fail a home inspection down the line and isn’t something a homeowner can self-certify. Larger picture windows typically require two people to maneuver safely and heavier anchoring than a standard DIY kit accounts for.
Basement egress windows are not a reasonable DIY project under almost any circumstance. Cutting a new opening into a foundation wall without proper structural support can compromise the wall, and most jurisdictions require a licensed contractor’s permit pull and a passed inspection before the project is considered legal. Getting this wrong doesn’t just risk a bad install — it can surface as an unresolved code violation when you go to sell the house.
A Middle Ground Worth Considering
If your real concern is a drafty or foggy window rather than wanting a full replacement, it’s worth confirming the problem is actually a failed seal or damaged glass rather than something that genuinely needs full replacement. Our guide to questions worth asking before hiring a glass repair service covers how to tell the difference, since a failed insulated glass unit can often be repaired at a fraction of full replacement cost if the frame itself is still sound.
Signs You Should Call a Professional Regardless of Room
A few conditions override the DIY-vs-professional table entirely: visible frame rot or soft wood around the current opening, any sign the house has settled enough that the opening is out of square, any project touching a load-bearing wall, and anything involving a basement or below-grade opening. In each of these cases, the cost of getting it wrong — water damage, structural compromise, failed inspection — far outweighs the labor savings of doing it yourself.
How to Vet a Window Installation Contractor
Choosing the right contractor matters more for window installation than most home-improvement categories, because a poor install doesn’t just look bad — it can cause hidden water damage, void manufacturer warranties, and in the case of egress windows, create an unresolved code violation that surfaces during a home sale.
Confirm Licensing and Insurance First
Start by confirming the contractor holds an active home improvement contractor license in your state, and ask for proof of both general liability insurance and workers’ compensation coverage. A legitimate contractor will provide these documents without hesitation. If a company is cutting your foundation wall for an egress window, also confirm they are pulling the structural and building permits themselves rather than asking you to pull them as the homeowner, since that shifts legal liability for code compliance onto you.
Ask for References Tied to Your Specific Project Type
A contractor’s general reviews don’t tell you much about how they handle a basement egress job specifically. Ask for two or three references from projects similar to yours — if you’re doing a kitchen window replacement, ask for kitchen window references; if you’re adding an egress window, ask specifically for other egress clients and, if possible, drive by or ask for photos of the finished window well. Contractors who’ve done the work well won’t hesitate to connect you with past clients.
Get Line-Item Quotes, Not Lump Sums
As covered earlier in this guide, a quote broken out by individual window lets you catch pricing that doesn’t match your home’s actual mix of rooms. Ask every contractor you’re comparing to break out labor, materials, glass package, and any permit or disposal fees separately. A lump-sum number makes it much harder to compare two bids apples to apples, and it’s also a common place for hidden costs to get buried.
Understand What’s Covered in the Warranty
Ask explicitly what the warranty covers and for how long — manufacturer warranties on the glass unit itself typically range from 10 to 20 years, but labor and installation warranties vary far more by contractor, sometimes as short as one year. Get the warranty terms in writing before signing, and clarify who you’d call if a seal fails: the manufacturer, or the installer.
Confirm Local Permit Familiarity
If your project involves any permit-required work — egress windows, structural openings, or opening-size changes — ask the contractor how many permits they’ve pulled in your specific town or county in the past year. A contractor unfamiliar with your local building department’s review process can add weeks of delay waiting on paperwork or facing avoidable rejections. This matters even for routine repair work; our area-specific guide to window repair in Cherry Hill, NJ covers some of the local permitting quirks homeowners in that market run into, and the same logic applies to full installation projects elsewhere in the region.
Watch for Red Flags During the Quote Process
Be cautious of any contractor who quotes a firm price without physically measuring every opening, who pressures you to sign same-day for a “limited time discount,” or who can’t clearly explain why one room’s window costs more than another’s. A contractor confident in their pricing should be able to walk you through the reasoning room by room, the same way this article has, rather than defaulting to a single average number for the whole project.
Put Everything in the Contract
Before signing, confirm the contract specifies exact window models and glass specifications by room, a project timeline with milestones, who pulls and pays for permits, cleanup responsibilities, and the warranty terms discussed verbally. Verbal promises that don’t make it into the written contract are not enforceable if a dispute comes up later, and this is especially important on multi-room projects where it’s easy for a verbal upgrade discussed for one room to get lost by the time installation day arrives.
Get a Room-by-Room Quote, Not a Guess
Generic ballpark pricing doesn’t account for your home’s actual window sizes, glass needs, or local code requirements. Our estimators measure every opening in your project — bedroom, kitchen, bathroom, or basement — and hand you a line-item quote before any work begins. Call now or schedule a free on-site assessment, and know exactly what each window will cost before you commit to a whole-house project.