
Why Wooden Sash Window Repairs Are Worth Getting Right Wooden sash window repairs are one of the most valuable maintenance tasks you can do for an older home. Done right,
Why Wooden Sash Window Repairs Are Worth Getting Right
Wooden sash window repairs are one of the most valuable maintenance tasks you can do for an older home. Done right, they restore smooth operation, cut drafts, and can add decades of life to windows that might otherwise end up in a skip.
Quick answer — the most common wooden sash window repairs and how to tackle them:
Problem DIY or Pro? Quick Fix Sticking sash DIY Wax or silicone spray on tracks; sand swollen edges Broken sash cord DIY–Moderate Thread new cotton rope through pulley, rebalance weights Small rot patches DIY Chisel out rot, fill with epoxy consolidant and wood filler Large rot (sill, rail, stile) Pro recommended Cut out damaged timber, splice in matching hardwood Cracked or broken glass DIY–Moderate Remove old putty, seat new pane, reglaze with compound Drafts and rattling DIY Add brush seals or weatherstripping to meeting rails and beads
Sash windows are a defining feature of many older New Jersey homes. They add real character — but they also come with real maintenance demands.
The good news? Most problems look worse than they are. One professional carpenter puts it well: many windows that appear to be beyond saving turn out to be largely repairable once old paint is stripped back.
Repairs also make strong financial sense. DIY restoration materials typically cost under $50 per window, compared to $1,000–$2,000 for a professional full restoration — and far less than full replacement. Even a professionally repaired sash window typically runs just $200–$400.
This guide walks you through everything: anatomy, damage assessment, rot repair, cord replacement, reglazing, draught-proofing, and when to call in the experts.

Understanding Your Windows: Anatomy and Common Issues
Before we dive into the “how-to,” we need to speak the language of windows. A wooden sash window isn’t just a piece of glass in a frame; it is a sophisticated machine designed for ventilation and light.
The sash itself is the movable frame that holds the glass. In a double-hung window, both the top and bottom sashes move. These are held in place by muntins (the thin strips of wood separating panes of glass) and are guided by the staff bead (the interior trim) and the parting bead (the thin strip between the two sashes).
At the bottom sits the window sill, which is sloped outward to shed water. Inside the wall, hidden from view, are the weights connected to the sashes by cords that run over pulleys. This counterweight system is what allows a heavy wooden window to stay open at any height.
If your window is difficult to slide or won’t stay up, it likely needs a Window Adjustment or a more comprehensive Window Repair to restore that delicate balance.
Assessing Damage Before Starting Wooden Sash Window Repairs
Don’t let a little flaking paint scare you! To know if you’re looking at a DIY weekend project or a professional overhaul, you need to perform the “screwdriver test.”
Take a flat-head screwdriver and press it firmly into any wood that looks discolored or soft, especially around the sill and the bottom rail of the sash.
-
Solid Wood: The screwdriver won’t penetrate; the wood feels firm. This just needs a light sand and paint.
-
Spongy Wood: If the screwdriver sinks in easily, you’ve found rot.
If the rot is localized, you can often perform a Rotten Window Frame Repair using epoxy. However, if the screwdriver goes all the way through or the wood crumbles like a dry biscuit, the structural integrity is compromised. We generally use the “50% rule”: if more than half of the timber is soft, it’s time to consider a replacement component.
Common Problems with Timber Sashes
Living in New Jersey means our windows face everything from humid summers in Hoboken to freezing winters in Ridgewood. This climate takes a toll.
-
Broken Cords: This is the #1 reason windows get “painted shut” or propped open with a stick. When the cotton rope snaps, the weight drops to the bottom of the pocket.
-
Sticking Sashes: Often caused by layers of old paint “bridging” the gap between the sash and the frame. High humidity can also cause the wood to swell.
-
Rattling and Drafts: As wood ages and paint wears away, the clearances between the beads and the sash grow. This lets in the wind and causes that annoying “clatter” during storms.
-
Cracked Glazing: The putty (glazing compound) that holds the glass in place eventually dries out and falls away, leading to loose glass and water leaks.
-
Mechanical Failure: In some newer “mock” sash windows, you might find a Window Spring Replacement is needed if the modern balance tubes have failed.
Essential Tools and Safety for Restoration
Before you start swinging a hammer, we have to talk about safety — specifically lead paint. If your New Jersey home was built before 1978, there is a very high chance your windows are coated in lead-based paint.
Safety First Checklist:
-
PPE: Use a P100-rated respirator (not just a paper mask) and gloves.
-
Containment: Lay down 6-mil plastic sheeting to catch all scrapings.
-
HEPA Vacuum: Never use a standard household vacuum for lead dust; it will just blow the particles back into the air.
-
Wet Scraping: Use a spray bottle to keep the paint damp while you work to minimize dust.
The Tool Kit:
-
Flat Pry Bar: For gently removing the staff beads.
-
Wood Chisels: To remove rotted wood and old putty.
-
Heat Gun or Infrared Stripper: For softening old paint (keep it under 1000°F to avoid vaporizing lead).
-
Epoxy Wood Filler: A two-part system (consolidant and filler) is essential for wood repair.
-
Utility Knife: To score paint lines so you don’t tear the wood.
Step-by-Step Guide to Wooden Sash Window Repairs
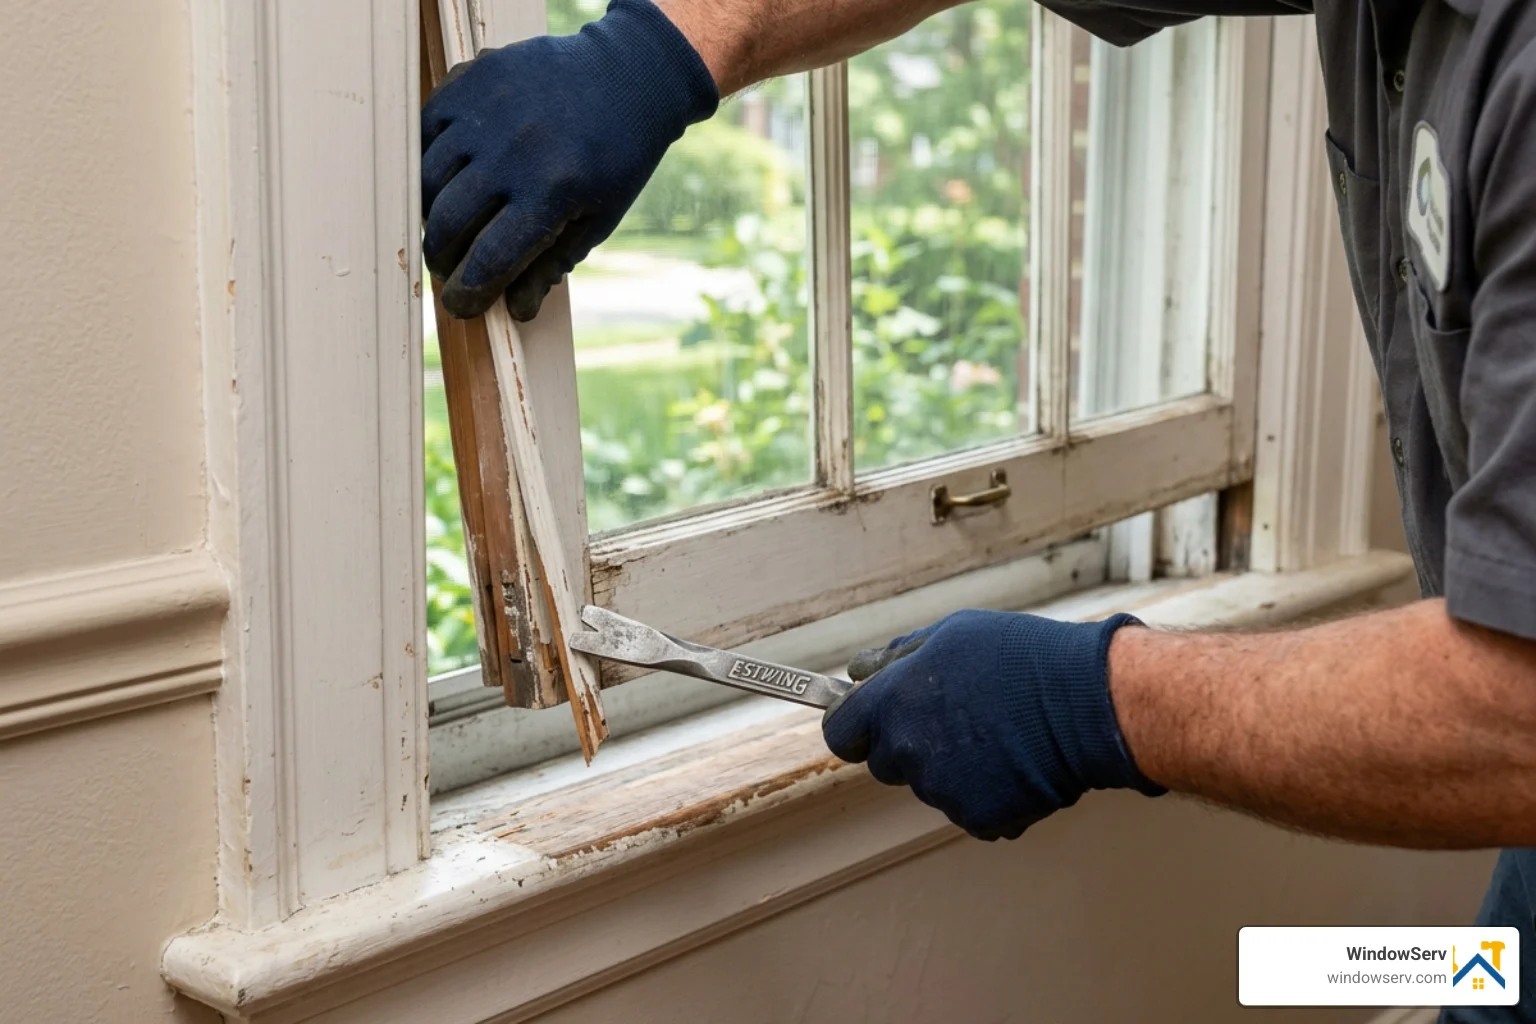
Ready to get to work? The first step is getting the sash out of the frame.
-
Score the Paint: Use your utility knife to cut through the paint where the staff bead meets the window frame.
-
Remove the Staff Bead: Gently pry the interior trim (staff bead) off. If you’re careful, you can reuse it.
-
Lift the Bottom Sash: Pull the bottom sash inward. You’ll see the cords attached to the sides.
-
Detach Cords: Pull the cord out of the sash groove, tie a knot in it so it doesn’t disappear into the pulley, and carefully lower the weight.
-
Remove the Parting Bead: This is the thin strip between the sashes. It often breaks during removal, so be prepared to buy a replacement.
-
Remove the Top Sash: Repeat the process for the top sash.
Once the sashes are out, you can assess if you need a Window Wood Rot Repair or if the damage is so severe that a Window Sash Replacement is the better option. For a deep dive into the mechanics, Everything You Need to Know to Repair Sash Windows – This Old House is a fantastic resource.
Repairing Rot and Replacing Sash Cords
For small areas of rot, use epoxy consolidation. This involves “painting” a liquid epoxy onto the soft wood to harden the fibers, then filling the gap with a thickened epoxy putty.
If a larger section like a corner joint is gone, we use a Dutchman patch. This means cutting out a neat rectangle of rotted wood and gluing in a new piece of matching timber (like Douglas Fir or Pine) using waterproof glue.
Replacing the Cords: Standard cotton sash rope can last 60+ years, but even the best eventually fray.
-
Open the “pocket cover” (a small removable door on the inside of the window track).
-
Remove the old weight and cord.
-
Drop a “mouse” (a piece of string with a weight on the end) over the pulley and down into the pocket.
-
Tie the new sash cord to the string and pull it through.
-
Re-attach the weight, ensuring it sits a few inches off the bottom of the pocket when the sash is fully closed.
Proper Window Balance Replacement and Repair ensures your windows move with the touch of a finger rather than a struggle.
Deglazing and Replacing Glass
If your glass is rattling or the putty is falling out, it’s time to reglaze. This is a core part of Window Restoration.
-
Deglazing: Use a heat gun or a chisel to carefully remove the rock-hard old putty. Be careful not to nick the wood or break the glass.
-
Bedding: Apply a thin bead of glazing compound in the “rabbet” (the groove where the glass sits). This creates a weather-tight seal under the glass.
-
Glazier Points: Press the glass into the bedding and drive in glazier points (small metal triangles) every 6 inches to hold the glass in place.
-
Final Putty: Apply the glazing compound at a 45-degree angle. Let it “skin over” for 3 to 5 days before painting.
If the sash is missing muntins or the wood is too far gone for a simple patch, we may move to Window Replication, creating an exact copy of your original sash to fit the existing frame.
Enhancing Efficiency: Draught-Proofing and Finishing
One of the biggest myths is that old windows are inherently “energy losers.” In reality, a restored window with a good storm window can meet or exceed modern energy codes.
Draught-proofing is the secret sauce. By installing discreet brush seals into the parting beads and the meeting rail (where the two sashes touch), you can eliminate the “whistle” and keep your New Jersey home cozy.
Feature DIY Cost (Per Window) Professional Cost (Per Window) Longevity Basic Cleaning/Paint $15 $150 5–8 Years Cord/Pulley Repair $25 $250 50+ Years Full Restoration $50 $1,000+ 60+ Years Draught-Proofing $20 $300 10–15 Years
A comprehensive Window Repair Restoration project doesn’t just look better; it can lead to up to 30% energy savings.
Best Practices for Finishing Your Wooden Sash Window Repairs
Painting a sash window is an art form. If you paint the sliding surfaces, the window will stick. If you don’t paint the exterior properly, the wood will rot.
-
Prime Everything: Use a high-quality oil-based primer on all bare wood before glazing.
-
The 1/16 Inch Rule: When painting the sash, allow the paint to overlap onto the glass by about 1/16th of an inch. This creates a “seal” that prevents water from getting behind the putty.
-
Leave the Sides Bare: Do not paint the edges of the sash that slide against the frame. Instead, rub them with a bit of paste wax or paraffin for smooth movement.
-
Choose the Right Paint: Gloss or semi-gloss latex exterior paint is usually best for the visible parts, as it handles the expansion and contraction of the wood better than old-fashioned oil paints.
If you find that your frames are too damaged for these techniques, you may need a full Window Installation to ensure your home remains protected from the elements.
Professional Restoration vs. DIY: When to Call the Experts
We love a good DIY project, but some situations require the heavy hitters.
Call a professional if:
-
Severe Rot: If more than 50% of the frame or sill is rotted, the structural integrity of the wall could be at risk.
-
Historic Preservation: If you live in a landmarked district in Montclair or Tenafly, there are strict rules about what materials can be used.
-
Lead Safety: If you have small children or pregnant women in the house, professional lead abatement is the safest route.
-
Out of Square: If your house has shifted and the window frames are no longer rectangular, a DIYer will struggle to get a good fit.
In these cases, a Window Replacement or a Professional Window Installation might be the most cost-effective long-term solution. Our team can help you decide if your original frames can be saved or if it’s time for a fresh start.
Frequently Asked Questions about Sash Window Maintenance
How do I fix a sash window that is sticking?
First, check for “paint bridges.” Use a utility knife to cut through any paint that has sealed the sash to the frame. If it’s still stuck, try rubbing a candle or some furniture wax along the tracks. If the wood has swollen due to New Jersey’s humidity, you may need to lightly sand the edges of the sash.
How much does it cost to repair a wooden sash window?
For a DIYer, you can get the materials (rope, putty, epoxy) for under $50. If you hire a pro for a standard repair (cords and minor rot), expect to pay between $200 and $400 per window. A full museum-quality restoration can range from $1,000 to $2,000.
How long do new sash cords typically last?
If you use high-quality waxed cotton cord (like Samson Spot Cord), it should last between 50 and 70 years. Avoid nylon or synthetic ropes, as they can stretch or degrade in the sun, sometimes failing in as little as 10 years.
Conclusion
At WindowServ, we believe that the original wooden windows of New Jersey are worth saving. Whether you are in the historic streets of Jersey City or the leafy suburbs of Summit and Westfield, your sash windows are a bridge to the past and a key part of your home’s efficiency.
We provide professional window repair, replacement, and restoration services across Bergen, Essex, Hudson, Middlesex, Monmouth, and Union counties. Our local NJ experts specialize in comprehensive solutions that save your original frames while delivering up to 30% energy savings.
Don’t settle for drafts and rattling. Whether you need a simple cord replacement or a full-scale restoration, we are here to help with a satisfaction guarantee. More info about window restoration services is just a click away. Let’s bring that historic charm back to life!