
How to Master Your Custom Frame Window Install
Why a Custom Frame Window Install Is Worth Getting Right
A custom frame window install means completely removing your old window — frame, sill, and all — and replacing it with a brand-new unit fitted precisely to your rough opening. Unlike a simple insert (or "pocket") replacement that slides into the existing frame, a full-frame install starts from scratch.
Here's a quick overview of what's involved:
Remove the old window, frame, sash, and trim down to the rough opening
Inspect the rough opening for rot, water damage, or structural issues
Measure the opening precisely and order a custom-sized window
Prep the opening with flashing, a sill pan, and a waterproof membrane
Set the new window, shim it level and plumb, then fasten it securely
Seal all gaps with low-expansion foam and high-grade caulk
Finish interior and exterior trim to complete the installation
For older New Jersey homes — especially those with wood rot, foggy glass, or rising energy bills — this approach addresses the root cause rather than just covering it up.
A full-frame install costs more upfront than an insert replacement (typically 20-30% more), but it gives you a clean slate. You get a tighter building envelope, more glass area, and the ability to resize or reshape the opening entirely.
Whether you're tackling this yourself or hiring a pro, understanding the full process helps you avoid the costly mistakes that turn a weekend project into a months-long repair job.

Understanding the Custom Frame Window Install Process
When we talk about a custom frame window install, we are describing a "new construction" style of replacement. This isn't just swapping out the moving parts; it is a surgical removal of the entire window assembly down to the house’s skeletal studs.

The primary goal here is superior Professional Window Installation. While an insert window sits inside your existing frame (reducing your glass viewing area), a full-frame install allows for a larger piece of glass because the bulky old frame is gone. More importantly, it allows us to address the "drainage plane"—the path water takes as it runs down your house. If your old window leaked, an insert won't fix the rot hidden in the wall. A full-frame install does.
Window Installation Methods: A Quick Comparison
To help you decide which path is right for your North Jersey home, let's look at how these two main methods stack up.
Feature Full-Frame (Custom) Install Insert (Pocket) Replacement Scope Removes frame, sills, and trim Keeps existing frame and trim Glass Area Maximized; often increases Reduced; sits inside old frame Energy Efficiency Highest; eliminates thermal bridging Moderate; limited by old frame Cost 20-30% higher labor/materials More budget-friendly Best For Rot, structural issues, resizing Sound frames, historic trim preservation
By opting for a full-frame approach, we can eliminate "thermal bridging"—the process where heat escapes through the gaps in old, uninsulated window pockets. We replace those empty spaces with modern insulation and high-performance flashing.
When to Choose Full-Frame Over Pocket Replacement
We often see homeowners in places like Ridgewood or Montclair who are torn between these two options. We recommend a custom frame window install if you notice any of the following:
Rotten Sills or Frames: If you can poke a screwdriver into your wood and it feels soft, you need Window Wood Rot Repair. An insert window cannot be safely installed into a decaying foundation.
Out-of-Square Openings: If your house has settled and the window opening is a "parallelogram" rather than a rectangle, a standard insert won't fit right. We need to get down to the studs to level things out.
Size or Shape Changes: Want to turn two small double-hungs into one large picture window? That requires a full-frame overhaul.
Historic Preservation: While inserts preserve trim, sometimes the structural integrity of a 100-year-old home requires a full-frame update to protect the building for another century. You can check out this Full Frame vs Insert Window Replacement: Installation Guide for more technical nuances.
Performance Benefits of a Custom Frame Window Install
The energy savings alone are a massive motivator for New Jersey residents. According to ENERGY STAR data, high-efficiency windows perform at least 15% better than standard models. When you combine that glass with a full-frame install, the benefits multiply:
U-values: We aim for U-values of 0.3 or lower. The lower the number, the better the window keeps heat inside during a Summit winter.
Air Infiltration: By sealing the rough opening ourselves, we ensure zero drafts. This is much more effective than relying on the seal of an old, warped frame.
Soundproofing: New, tight-fitting frames significantly reduce street noise—a must for our friends in Jersey City or Hoboken.
UV Protection: Modern custom windows often come with coatings that block 95% of UV rays, preventing your furniture and floors from fading.
Condensation Control: If your windows are constantly foggy, it’s a sign of seal failure. Sometimes Window Restoration can help, but a full replacement is the permanent fix.
Preparing the Rough Opening for Success
Preparation is 90% of the work. If the rough opening isn't perfect, the most expensive window in the world will still leak and draft.
Tool and Material Requirements
Before you start, gather your arsenal:
Tools: Level (4-foot is best), power drill, pry bars, multi-tool (for cutting old caulk), and a hammer.
Safety Gear: Gloves, eye protection, and if your home was built before 1978, a lead-safe respirator.
Materials: High-quality flashing tape, a pre-formed sill pan, shims, and low-expansion window/door foam.
How to Measure for a Custom Frame Window Install
Measuring for a custom frame window install is different than measuring for an insert. You aren't measuring the window; you are measuring the hole in the wall.
Width: Measure between the studs at the top, middle, and bottom. Use the smallest number.
Height: Measure from the header to the sub-sill at the left, center, and right. Use the smallest number.
Squareness: Measure diagonally from corner to corner. If the two numbers are more than 1/8 inch apart, the opening is out of square.
Jamb Depth: Ensure your new window matches the thickness of your wall (usually 4 9/16" or 6 9/16").
If you have unique architectural features, you might need Window Replication to ensure the new frame matches the historic character of your neighborhood.
Identifying Structural Issues and Rot
Once the old frame is out, we perform a "health check" on your home's bones. We look for:
Sub-sill Inspection: Is the wood under the window stained or soft?
Header Damage: Is the beam above the window sagging?
Pest Damage: Look for termite galleries or carpenter ant debris.
Sheathing Integrity: The wood behind your siding must be solid to hold the flashing tape.
If we find issues, we perform a Rotten Window Frame Repair or more extensive Window Repair Restoration before the new unit ever touches the opening.
Step-by-Step Guide to a Professional Installation
Now for the main event. Installing a full-frame window is a heavy-duty task that requires patience.
Sash and Frame Removal: Remove the interior stops, then the sashes. Use a pry bar to carefully remove the old frame and exterior brickmould.
Prep the Opening: Clean away all old debris. Install a sill pan—this is a sloped plastic or metal tray that directs any future leaks back outside.
Apply Flashing: Use self-adhesive flashing tape on the sill, extending it up the sides at least 6 inches. This creates a "waterproof bucket" at the bottom of the opening.
Dry Fit: Lift the window into the opening (this is a two-person job!) to ensure it fits with about a 1/4-inch gap all around.
Setting the Unit: Apply a thick bead of high-grade sealant to the back of the window's nailing flange (if it has one) or the outer edge of the frame.
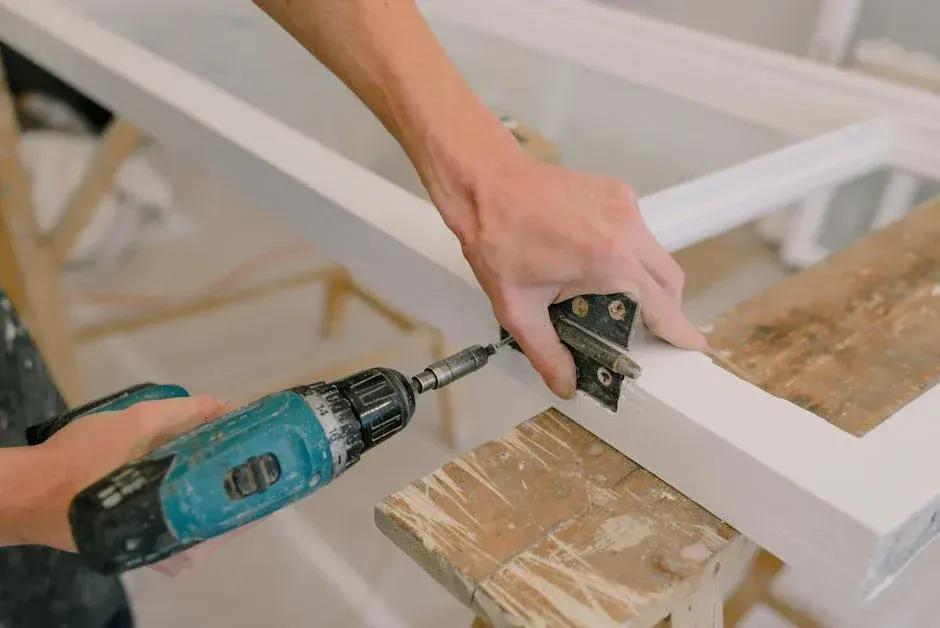
Shimming: This is the most critical step. Place shims at the corners and near the pre-drilled installation holes. Check for level (horizontal), plumb (vertical), and square (diagonal).
Fastening: Once perfect, drive screws through the shims and into the studs. Do not over-tighten, or you’ll bow the frame.
For a deeper dive into different technical approaches, check out this guide on How to Install a New Construction (Full-Frame) Window. If this sounds like a lot, don't worry—our team handles Window Installation every day across Essex and Union counties.
Sealing and Flashing Your Custom Frame Window Install
A window is only as good as its seal. We use a "belt and suspenders" approach to water management:
Drip Caps: A metal flashing installed over the top of the window to shed water away from the frame.
Low-Expansion Foam: Fill the gap between the window and the studs. Warning: Use only "Window & Door" foam. Standard high-expansion foam can actually crush your window frame as it hardens!
Backer Rods: For larger gaps, we tuck a foam rod into the space before applying caulk.
High-Grade Sealant: We use solar-stable, flexible sealants that won't crack during a Livingston heatwave or a Westfield freeze.
If you ever notice water leaking through the top of your window, it's likely a flashing failure, which may require a targeted Window Repair.
Finishing Interior and Exterior Trim
The final 5% makes the biggest aesthetic impact.
Interior: Reinstall your casing (or put in new, modern trim). We use color-matched wood filler and high-quality paint to make it look seamless.
Exterior: If you have a brickmould, ensure it is caulked tightly to the siding or masonry.
Functionality: Test the window! It should slide, tilt, or crank with almost zero effort. If it binds, your shims might be too tight.
For many homeowners, this is the perfect time for a full Window Replacement to update the look of the entire room.
Adapting to Different Exterior Facades
In New Jersey, we see everything from 1920s brick in Jersey City to modern stucco in Tenafly. Each requires a different approach.
Brick Veneer: We often use "block frame" windows here, which don't have a nailing flange. They are secured through the side of the frame into the wood studs behind the brick.
Stucco: This is the trickiest. We often use specialized stucco liners and flush flanges to ensure water doesn't get behind the "skin" of the house.
Lap Siding (Vinyl/Wood): We typically cut back the siding, install the window with a nailing flange, tape it to the house wrap, and then install new trim over the top.
Building Codes: Always check local NJ codes. Some areas require impact-resistant glass or specific fire-rating distances from property lines.
Frequently Asked Questions about Custom Window Frames
How much does a full-frame installation cost compared to an insert?
On average, a custom frame window install costs 20-30% more than an insert. This is due to the increased labor (removing the old frame and trim) and the cost of the new interior/exterior trim materials. However, the ROI is often higher because you are fixing underlying structural issues and maximizing energy efficiency. You can save 7% to 15% on your monthly utility bills with high-efficiency units.
Can a DIYer successfully complete a custom frame install?
It is possible, but it’s a high-stakes project. If you mess up the flashing, you won't know it until your wall starts rotting two years later. You also risk voiding the manufacturer's warranty if the unit isn't installed exactly to their specs. For most homeowners in places like Paramus or Cresskill, professional oversight is recommended for anything beyond a simple ground-floor replacement.
How long does the installation process typically take?
A professional crew can usually install a full-frame window in 4 to 8 hours, depending on the exterior material. An insert takes only 1 to 3 hours. If you are doing a whole house (say, 10-15 windows), expect a 3 to 5-day project including all the trim and finishing work.
Conclusion
Mastering a custom frame window install is the best way to ensure your home remains comfortable, quiet, and energy-efficient for decades to come. While it requires more effort than a quick "pocket" swap, the benefits of a larger viewing area and a perfectly sealed building envelope are well worth the investment.
At WindowServ, we are your local New Jersey experts. Whether you are in Bergen, Hudson, or Monmouth County, our team provides comprehensive solutions that prioritize the health of your home. We offer a satisfaction guarantee and use only high-performance, ENERGY STAR-rated products.
Ready to upgrade your home's performance? Schedule your professional window replacement with us today and experience the difference a master-level installation makes!
