
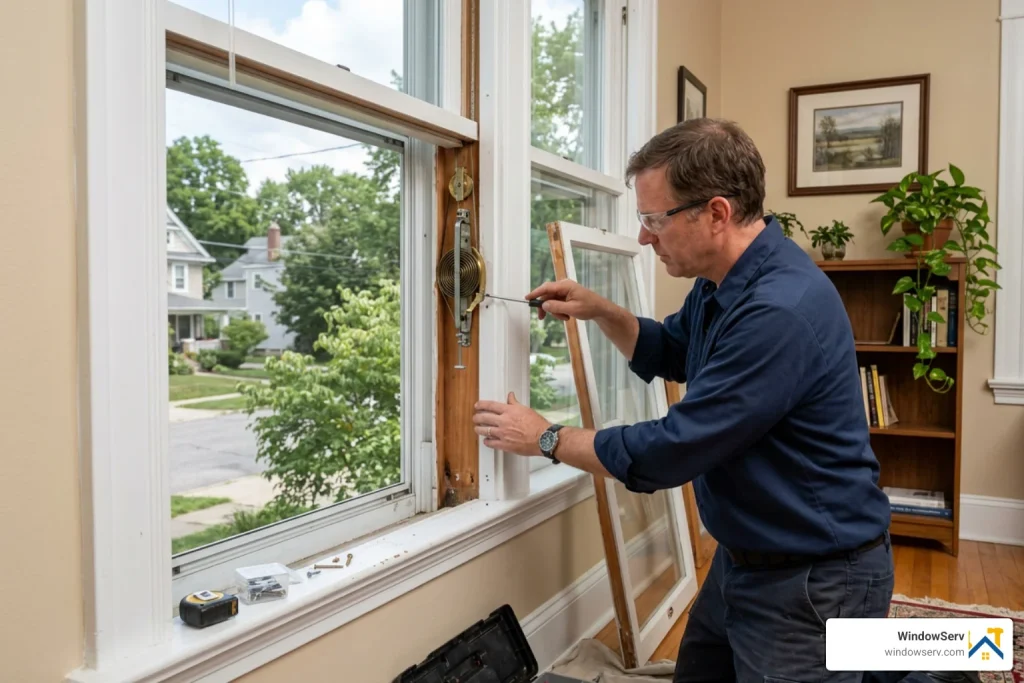
Why Your Windows Won’t Stay Open — and What to Do About It fixing window balances Fixing window balances is the most common solution when a window slams shut, feels
Why Your Windows Won’t Stay Open — and What to Do About It
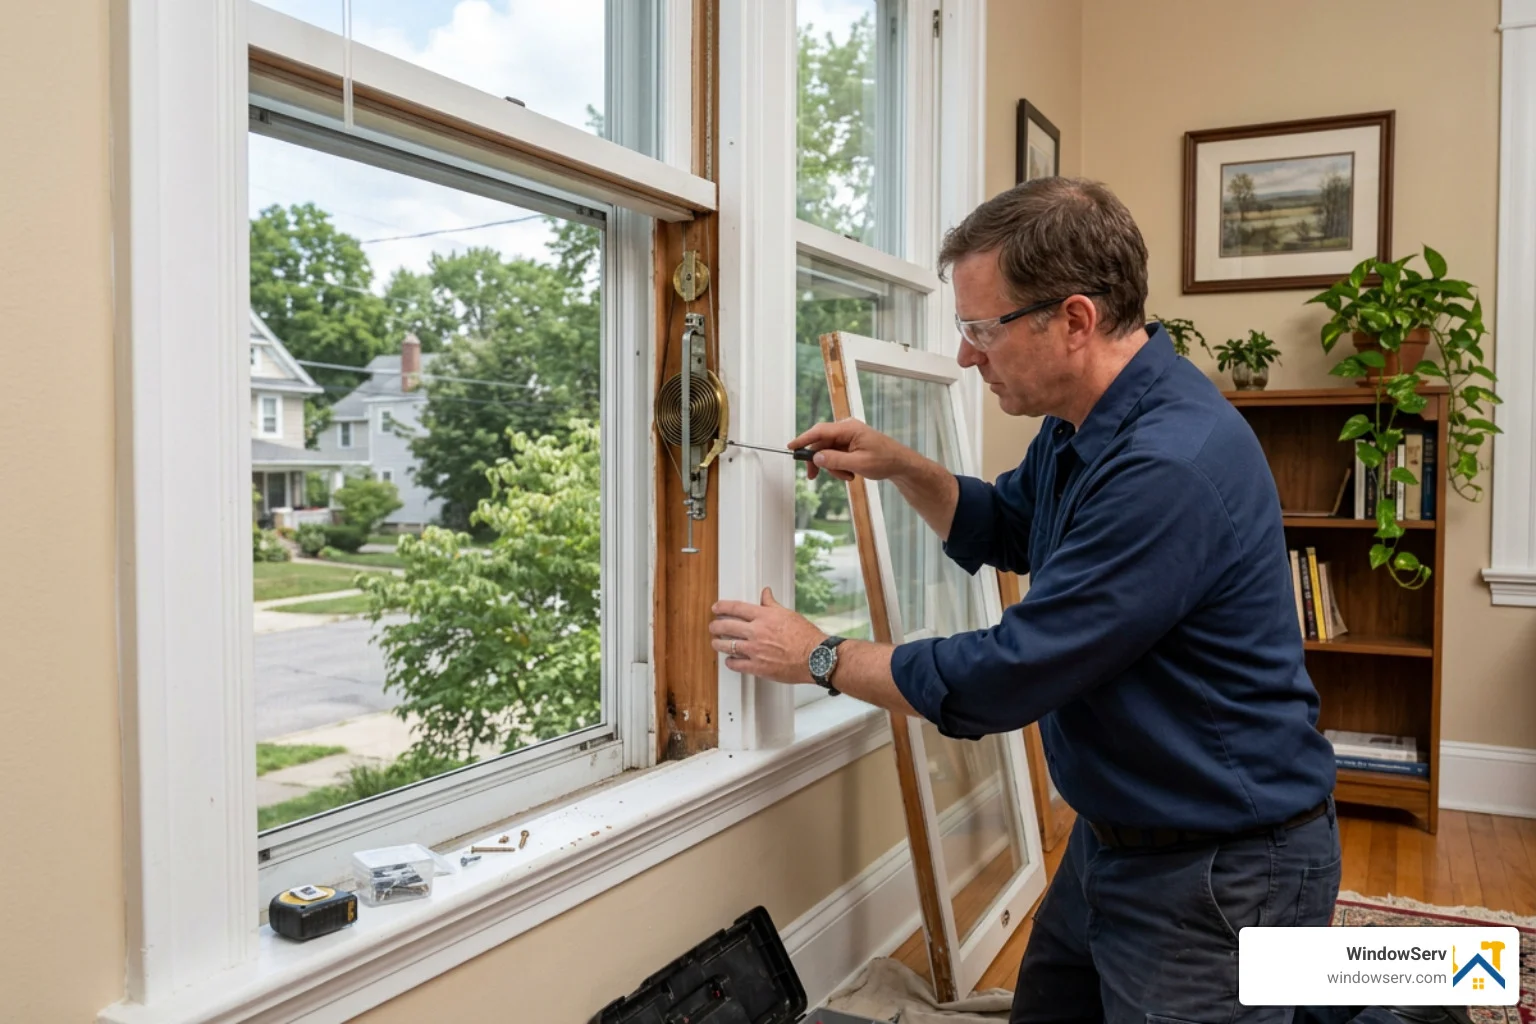
Fixing window balances is the most common solution when a window slams shut, feels impossibly heavy to lift, or refuses to stay open on its own.
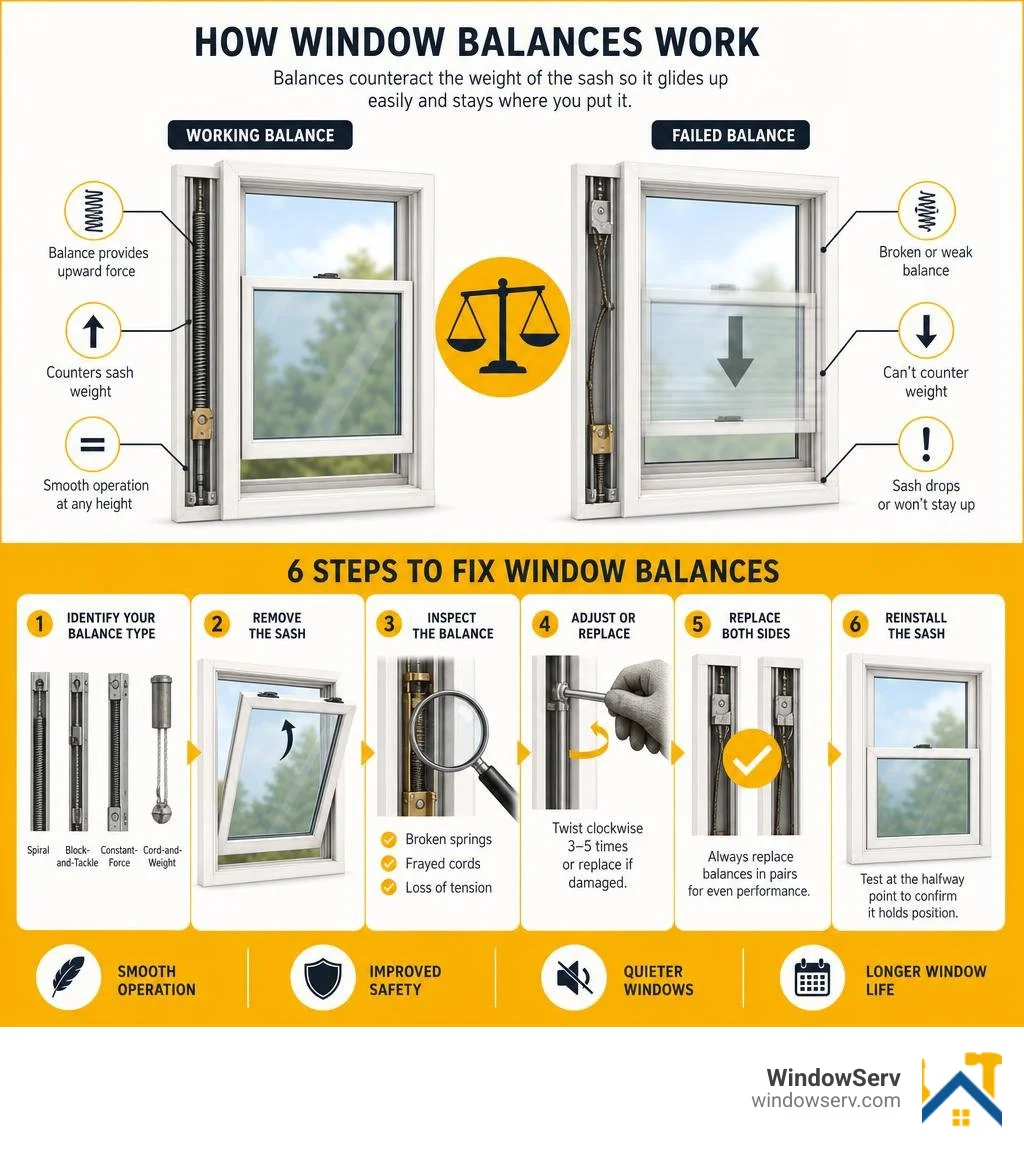
Here’s a quick overview of how to fix window balances:
- Identify your balance type — spiral, block-and-tackle, constant-force, or cord-and-weight
- Remove the window sash — tilt it inward using the tilt latches (if your window has them)
- Inspect the balance — look for broken springs, frayed cords, or loss of tension
- Adjust or replace — recharge spiral balance tension by twisting the rod clockwise 3–5 times, or swap out a damaged balance for a correctly sized replacement
- Replace both sides — always replace balances in pairs to prevent uneven wear
- Reinstall the sash — test the window at the halfway point to confirm it holds position
Window balances are the hidden spring mechanisms inside your window frame that counteract the weight of the sash. When they work, your window glides up effortlessly and stays exactly where you put it. When they fail, that same sash becomes a hazard — sliding down without warning or requiring real effort just to move an inch.
For New Jersey homeowners with older windows, this is an especially common problem. Frequent seasonal temperature swings put extra stress on balance components, accelerating wear over time. The good news is that in most cases, a failing balance can be fixed or replaced without touching the rest of the window.
I’m Feiruz Gabibov, Chief Operating Officer at WindoServ, a New Jersey-based window repair company where I’ve overseen hundreds of balance repairs and replacements across all window types — fixing window balances is one of the most frequent and fixable issues our teams handle. In this guide, I’ll walk you through exactly how to diagnose the problem and get your windows working smoothly again.
Understanding Window Balance Systems and Why They Fail
To understand why your window is suddenly behaving like a guillotine, it helps to look inside the frame. Single-hung and double-hung windows rely on vertical movement. Because glass and vinyl (or wood) sashes are heavy, lifting them without assistance would be a daily workout.
That is where the window balance system comes in. These spring-loaded mechanisms run vertically along the left and right sides of the window frame (the jambs). They act as a mechanical counterweight, neutralizing the sash’s weight so it feels virtually weightless when you open it.
When these systems fail, it is usually due to material fatigue, environmental factors, or physical damage. In New Jersey, our hot, humid summers and freezing winters cause window frames to expand and contract. This environmental movement can trap dirt inside the tracks, putting extra strain on the internal springs and pulleys until they eventually snap or lose their tension.
| Balance Type | Mechanism | Lifespan | Best For | Pros & Cons |
|---|---|---|---|---|
| Spiral | Tensioned rod inside a metal tube | 10–15 years | Vinyl & aluminum windows (1970s–1990s) | Pros: Adjustable tension. Cons: Shorter lifespan; spring cannot be repaired if broken. |
| Block-and-Tackle | Pulley system & extension spring in a channel | 15–20 years | Modern vinyl tilt windows | Pros: Handles heavy sashes smoothly. Cons: Leaves slightly more “wiggle room” for sash. |
| Constant-Force | Rolled stainless steel coil springs | 20+ years | Modern constructions | Pros: Extremely durable; rust-resistant; smooth operation. Cons: Harder to calibrate. |
| Cord-and-Weight | Cast-iron weights hanging on cotton cords | 50–100+ years | Historic wood windows (pre-1950) | Pros: Highly durable, repairable. Cons: Requires heavy wall pockets; drafts. |
The Four Main Types of Window Balances
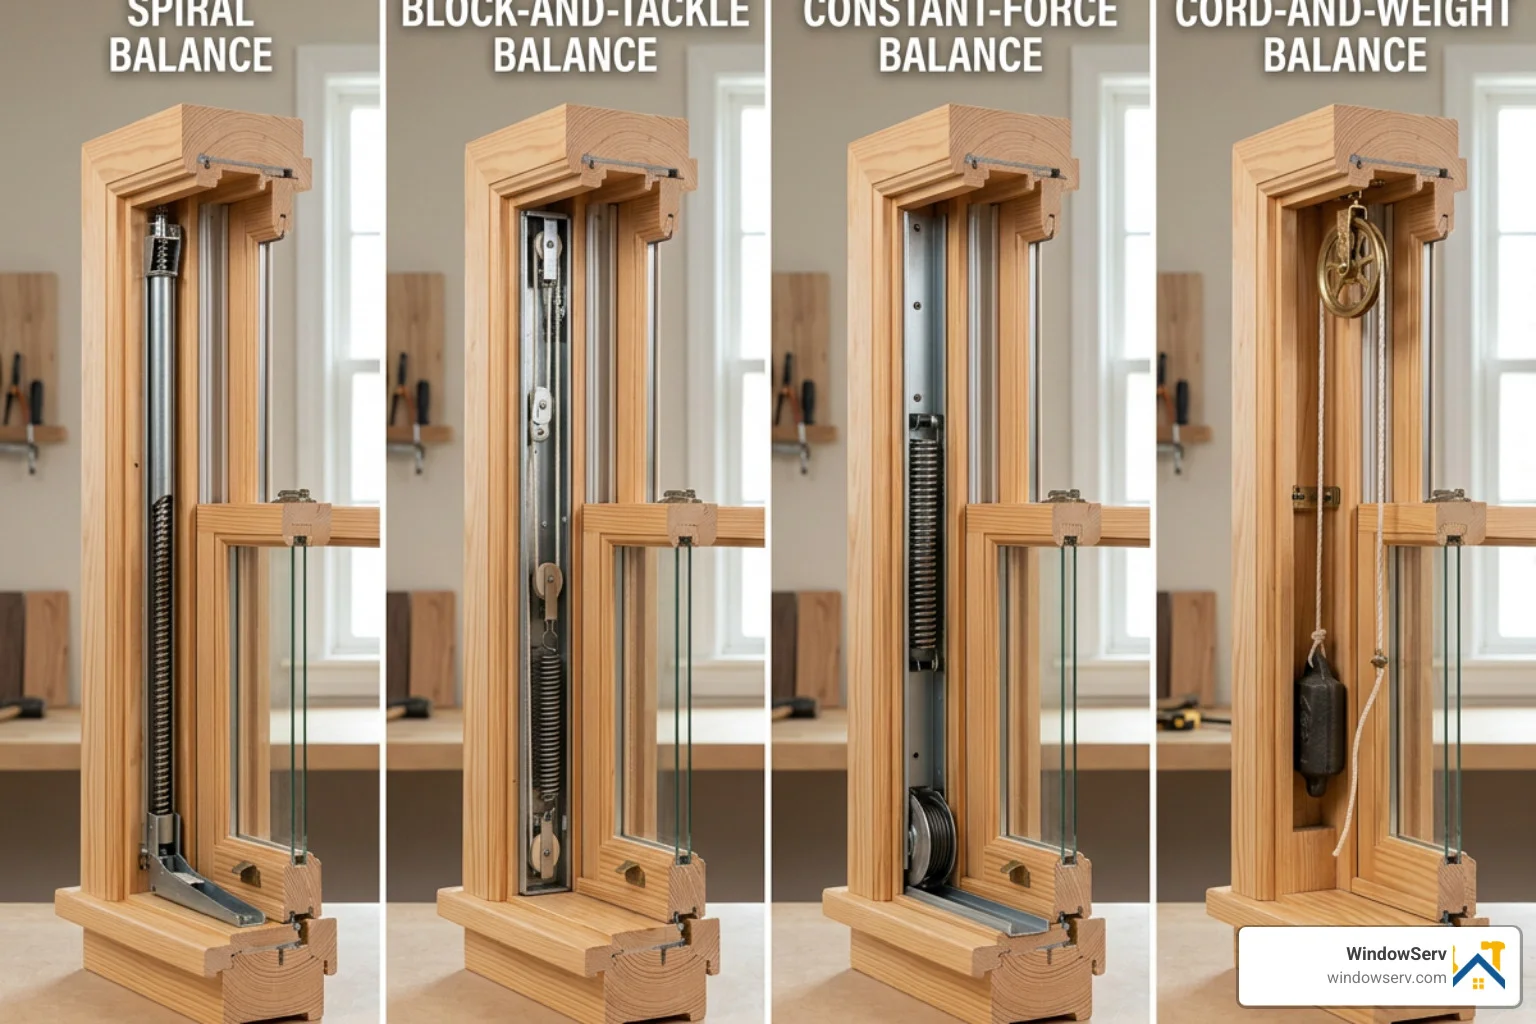
Before we can begin fixing window balances, we must understand the specific system installed in your home. Each has a unique design and requires a distinct repair strategy:
- Spiral Balances: These consist of a metal rod spiraling out of a metal or plastic tube. Inside the tube is a tensioned spring. As you raise or lower the window, the rod spins, winding or unwinding the spring to adjust the lifting assistance. These were incredibly popular in the 1970s and 1980s. If your window slides down slowly, you can often “recharge” the tension on these springs, but if the internal spring snaps, the entire unit must be replaced.
- Block-and-Tackle Balances: This system uses a combination of small pulleys (tackle) and an extension spring (block) housed inside a sturdy metal channel. A high-strength cord runs through the pulleys and hooks to the window sash. It is a highly reliable, heavy-duty system common in modern vinyl tilt windows. However, because it relies on a cord, that cord can eventually fray and snap. For more on handling these, read our guide on Double Hung Window Balance Repair.
- Constant-Force Balances: Also known as coil balances, these are the rising stars of modern window design. They utilize a tightly rolled band of stainless steel (similar to a heavy-duty tape measure) housed in a plastic carrier. When you open the window, the coil unrolls, providing constant, smooth tension. They are highly durable, rust-resistant, and rarely lose their tension over time.
- Cord-and-Weight Balances: If you live in an older, historic home in Bergen County or Hoboken, you likely have this traditional system. It consists of heavy cast-iron or lead weights hidden inside the wall cavity on either side of the window, connected to the sash via a cotton cord or metal chain draped over a pulley. While old-school, they are incredibly durable and can last over a century with simple cord maintenance.
Common Signs of a Broken Balance
How do you know if your window struggles are caused by a broken balance rather than a warped frame or a dirty track? Look out for these telltale signs:
- The Guillotine Effect (Slamming Shut): If you open your window and it immediately crashes back down the second you let go, your balances have completely lost their tension or the springs have snapped.
- The Heavy Lift: The window feels like pure deadweight. You have to use both hands and real physical effort just to raise it a few inches.
- Uneven Movement or “Racking”: The window sash tilts as it moves, sticking on one side while rising on the other. This indicates that one of the two balances has broken, leaving the remaining balance to carry the entire load alone.
- The “Creep”: You open the window halfway, and it slowly drifts down on its own. Alternatively, if constant-force balances are poorly calibrated, the window might “creep” upward against your will.
- Strange Noises: Squeaking, grinding, or a sudden, loud “pop” inside the frame usually indicates a spring has snapped or a pulley cord has broken.
If you notice these issues, it is time to take action before the falling glass becomes a safety hazard. Learn more about diagnosing these symptoms in this article on How To Fix Loose Window Balances.
Preparing for the Repair: Safety, Tools, and Sash Removal
Fixing window balances is a highly accessible DIY project, but it does require careful preparation. Because you will be working with heavy glass sashes and metal springs under high tension, taking shortcuts can lead to broken glass or personal injury.

Before you begin, gather the following essential tools:
- Safety glasses and heavy-duty work gloves
- Flathead and Phillips-head screwdrivers
- A spiral balance tension tool (if working on spiral balances)
- Needle-nose pliers
- A putty knife or painter’s tool
- A standard bathroom scale (to weigh the sash if replacing balances)
- Dry silicone spray lubricant
To ensure you have everything you need for your specific window style, review our comprehensive Single Hung Window Balance Repair Guide.
Safety Precautions for Fixing Window Balances
We cannot stress this enough: springs are polite right up until they aren’t. Window balances store a significant amount of kinetic energy. If a tensioned spring slips out of your grip or your tool, it can spin rapidly, causing deep cuts or shattering the window pane.
Always wear thick leather work gloves to protect your hands and safety goggles to safeguard your eyes from flying parts. Never attempt to adjust or release tension on a balance without a secure grip on your tools. Additionally, because window sashes are deceptively heavy and awkward to hold, we highly recommend working with a partner when removing or reinstalling large sashes. If your springs are severely damaged or rusted, it may be safer to seek professional Window Spring Replacement to avoid injury.
How to Safely Remove a Window Sash
To access and repair your window balances, you must first remove the window sash from the frame. The removal process depends on whether your window is a modern “tilt-in” model or an older “non-tilt” style.
For Tilt-In Windows (Common in modern vinyl double-hungs):
- Unlock and Raise: Unlock the window and raise the bottom sash about 3 to 4 inches.
- Disengage Tilt Latches: Locate the slide latches on top of the sash. Slide them inward simultaneously.
- Tilt the Sash: Gently tilt the top of the sash toward you into the room until it sits at a 90-degree angle to the frame.
- Lift and Remove: Lift the sash straight up to disengage the pivot bars (the metal pins at the bottom corners of the sash) from the balance shoes inside the tracks. Set the sash safely aside on a soft surface, like a carpet or towel.
For Non-Tilt / Side-Load Windows:
- Locate Take-Out Clips: Look inside the side tracks (jambs) about halfway up. You should see small metal or plastic tabs called take-out clips. Pop these clips out using a flathead screwdriver.
- Raise the Sash: Raise the sash upward. As it passes the clips, the balances will catch on them, locking the balances in place and releasing the tension on the sash.
- Slide and Remove: Push the sash to one side (compressing the flexible jamb liner) and pull the opposite side out of the frame.
For visual aids and community troubleshooting on trickier non-tilt frames, you can refer to this helpful discussion on Replacing balancers in vinyl windows that do not tilt out…images … .
Step-by-Step Guide to Fixing Window Balances
Once the sash is safely removed, you will have a clear, unobstructed view of the jamb tracks and the balance systems hidden within them. Now, we can begin the actual work of diagnosing, adjusting, or replacing the hardware.
If you are dealing with a channel-based system, you can find specific step-by-step guidance on Window Channel Balance Repair.
Identifying Your System Before Fixing Window Balances
Before ordering any replacement parts, you must identify your exact balance system. Do not rely on your window’s brand name alone; manufacturers often change balance styles across different product lines and years.
Instead, perform a physical inspection:
- Measure the length: Measure the metal channel or plastic tube of your balance. Do not include the plastic end fittings in this measurement.
- Check the diameter: If you have a spiral balance, measure the diameter of the tube (typically 3/8 inch or 5/8 inch).
- Locate the stamp code: Look for a stamped four-digit number or code on the metal channel (e.g., “2830” or “28-C”). This code tells you the length and weight capacity of the spring inside.
- Examine the plastic end fittings: Take photos of the plastic guides at the top and bottom of the balance. Matching these plastic shapes is critical, as they ensure the balance fits securely into your specific window track.
If your original balance is missing entirely, do not panic. You can still find the correct replacement by measuring the height of your window opening and weighing the sash on a bathroom scale.
Adjusting and Recharging Spiral Balances
If your window has spiral balances and is starting to drift downward, the internal spring has likely lost its tension. You can often “recharge” this tension without replacing the part.
- Locate the Balance Shoe: Look at the bottom of the spiral balance tube. The spiral rod connects to a plastic pivot shoe locked in the track.
- Engage the Tension Tool: Slide a specialized spiral balance tension tool over the bottom pin of the spiral rod.
- Release the Rod: Pull down slightly with the tool to disengage the rod from the pivot shoe. Hold on tight — the spring will want to spin rapidly!
- Wind the Spring: To increase tension, wind the rod clockwise (usually 3 to 5 full turns is enough to restore neutral buoyancy). Be sure to apply the exact same number of turns to both the left and right balances to keep the window even.
- Re-engage the Shoe: Push the rod back up into the slot on the pivot shoe to lock it back in place.
For more tips on fine-tuning this system, check out our guide on Window Adjustment.
Replacing Block-and-Tackle and Constant-Force Balances
If your block-and-tackle cord is snapped, or your constant-force coil spring is cracked or rusted, adjustment is not an option — you must replace the hardware.
Replacing Block-and-Tackle (Channel) Balances:
- Remove the Retaining Screw: Locate the screw or metal clip holding the top of the channel balance to the window frame and remove it.
- Unhook the Cord: Slide the channel down and unhook the pulley cord from the bottom pivot shoe. Take out the old balance.
- Install the New Balance: Hook the cord of your new channel balance into the pivot shoe, slide the channel up into position, and secure the top with the retaining screw.
For a complete walkthrough on this style, read our guide on Block and Tackle Window Balance Replacement.
Replacing Constant-Force (Coil) Balances:
- Unlock the Pivot Shoe: Insert a flathead screwdriver into the U-shaped cam slot in the center of the pivot shoe. Turn it 90 degrees to unlock the shoe from the track.
- Slide the Assembly Out: Carefully slide the shoe and coil assembly up and out of the jamb pocket.
- Swap the Springs: Detach the old coil spring from the plastic carrier and hook the new coil spring in its place.
- Reinstall and Lock: Slide the assembly back into the track, move it to the correct height, and turn the screwdriver 90 degrees to lock the shoe back in position.
You can find further details on sourcing and replacing these channels at Window Channel Balance Replacement.
Choosing the Correct Replacement Parts
When ordering replacement balances, precision is everything. Do not guess or round your measurements. If you install a balance that is rated for a lighter sash than your actual window, the window will continue to slam shut. If you install a balance that is too strong, the window will be incredibly difficult to close, or it will creep upward on its own.
Always weigh your window sash on a bathroom scale before ordering. If your sash weight falls squarely between two balance weight ratings, stick with the rating stamped on your original balance to ensure a perfect match. For a detailed breakdown of spring specifications, see our guide on Double Hung Window Balance Spring Replacement.
Maintenance Tips to Extend Window Balance Lifespan
Window balances typically last between 10 and 20 years, but their lifespan is heavily influenced by how well you maintain your windows. With a few simple habits, you can keep your windows gliding effortlessly for decades:
- Clean the Tracks Twice a Year: Dirt, pet hair, and outdoor debris act like sandpaper inside your window tracks, grinding down pulleys and wearing out springs. Vacuum your window tracks regularly and wipe them down with a damp cloth.
- Lubricate with Dry Silicone Spray: Never use WD-40, grease, or heavy oils on your window tracks or balances! These wet lubricants act like dirt magnets, creating a thick, gritty sludge that will destroy your constant-force coils and block-and-tackle pulleys. Instead, use a high-quality dry silicone spray. It lubricates the tracks and moving parts without leaving a sticky residue.
- Operate Windows Gently: Avoid slamming your windows open or shut. Slamming places immense, sudden stress on the springs, cords, and plastic pivot shoes, leading to premature failure.
- Address Issues Early: If a window starts feeling slightly heavy or squeaks when opened, don’t ignore it. Taking 15 minutes to clean and lubricate the track now can prevent a snapped spring later.
If you suspect your windows need a deeper inspection, our local teams offer comprehensive support through our Window Balance Repair Service.
Frequently Asked Questions About Window Balances
Should I replace both window balances at the same time?
Yes, absolutely. We strongly recommend replacing both the left and right balances at the same time, even if only one side appears broken.
When a window balance fails, the remaining balance on the opposite side is forced to carry the entire weight of the sash. This places immense stress on the older balance, causing it to wear out rapidly. If you only replace the broken side, the uneven tension between the old, weakened spring and the new, strong spring will cause the window sash to tilt and stick in the frame. Replacing them in pairs ensures smooth, balanced, and long-lasting operation.
How long do window balances typically last?
Under normal residential use, high-quality window balances typically last between 10 and 20 years. However, their actual lifespan depends on several factors:
- Frequency of use: Windows that are opened and closed daily will experience faster wear than those left shut.
- Environmental conditions: Homes near the coast or in high-humidity areas of New Jersey may experience faster spring corrosion.
- Maintenance: Regularly cleaned and lubricated balances will easily outlast neglected, dirt-clogged systems.
When is it better to call a professional for window balance repair?
While many homeowners can successfully tackle a basic balance replacement, there are several situations where it is wiser and safer to call in our professional team:
- Heavy or Oversized Sashes: Large double-hung windows or thick, triple-pane glass sashes are incredibly heavy and dangerous to handle alone.
- Upper-Floor Windows: If you are working on second- or third-story windows, the risk of dropping a sash out of the frame is a serious safety concern.
- Complex or Broken Frames: If your window frame is warped, rotted, or has cracked vinyl corners, a simple balance replacement won’t solve the underlying issue.
- High-Tension Springs: If you feel uncomfortable working with highly tensioned metal springs, it is always best to let trained professionals handle the hardware safely.
Conclusion
Fixing window balances is one of the most cost-effective ways to restore your home’s comfort, safety, and energy efficiency. You don’t need to invest thousands of dollars in complete window replacements just because a window refuses to stay open. By taking the time to identify your system, prepare your tools, and follow the correct safety procedures, you can stop your windows from slamming shut for good.
At WindoServ, we are proud to serve homeowners across New Jersey — including Bergen, Essex, Hudson, Middlesex, Monmouth, and Union counties. Whether you need a quick repair in Hoboken, Jersey City, Ridgewood, Montclair, Tenafly, Cresskill, Paramus, Summit, Westfield, or Livingston, our local home improvement experts are here to help. We specialize in comprehensive window restoration solutions that preserve your original frames while delivering up to 30% in energy savings.
Ready to restore your windows to smooth, effortless operation? Schedule Window Balance Replacement and Repair with us today and enjoy the peace of mind that comes with our professional satisfaction guarantee!