

Is Your Window Leaking, Sticking, or Letting in Drafts? Here’s What to Do window adjustment homeowner inspecting misaligned double-hung window drafty interior Window adjustment is the process of correcting a
Is Your Window Leaking, Sticking, or Letting in Drafts? Here’s What to Do

Window adjustment is the process of correcting a window’s position, angle, and compression so it opens smoothly, closes fully, and seals tightly against the frame.
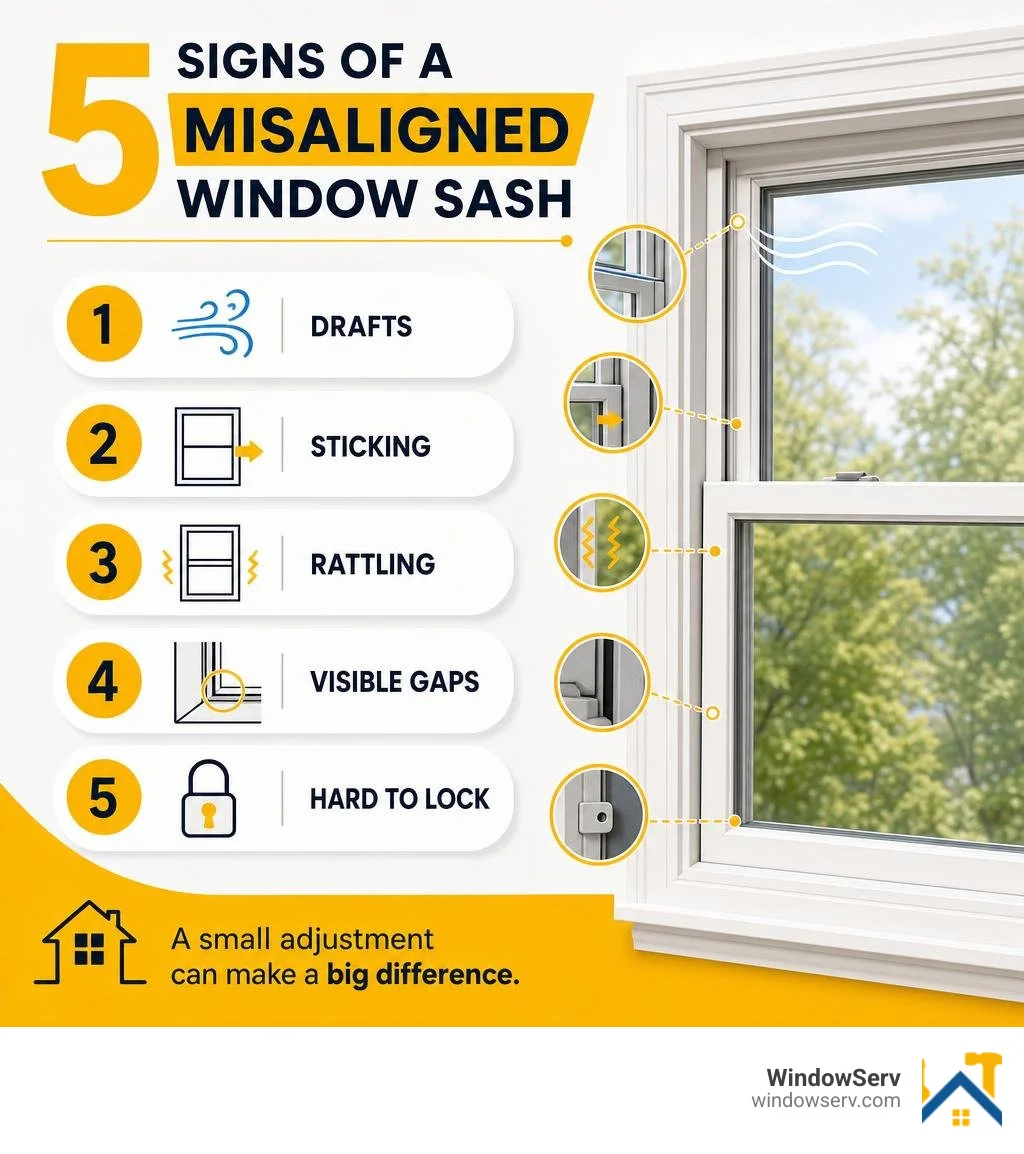
If your windows are acting up, here are the most common signs and quick fixes:
| Problem | Likely Cause | Quick Action |
|---|---|---|
| Drafts when closed | Weak seal compression | Adjust locking cams to winter mode |
| Window sticks or scrapes | Sash shifted out of alignment | Adjust bottom hinge height screw |
| Rattles or moves in frame | Loose stops or guides | Tighten or reposition stop hardware |
| Gaps visible around frame | Seasonal frame expansion/contraction | Lateral hinge adjustment |
| Hard to lock | Sash sitting too high or low | Height adjustment via corner bearing |
Most of these problems are fixable without replacing the window — often in under an hour with basic tools.
Here’s why this matters right now: New Jersey homes go through real seasonal swings. Cold winters and humid summers cause window frames to expand and contract, pulling sashes out of position over time. A window that sealed perfectly in July can develop a noticeable draft by January — not because it’s broken, but because it needs a simple seasonal tune-up.
A quick DIY check called the paper test can tell you immediately if your window seal is weak: slide a piece of paper between the sash and frame, close the window, and try to pull it out. If it slides out easily, your compression is off and an adjustment is overdue.
Properly adjusted windows can reduce heat loss by up to 15–20%, which translates to real savings on your heating bill every winter.
I’m Feiruz Gabibov, Chief Operating Officer of WindoServ, and through overseeing hundreds of window adjustment and repair jobs across New Jersey, I’ve seen how a small alignment fix can eliminate drafts, lower energy bills, and extend a window’s lifespan by years. In the steps below, I’ll walk you through exactly how to diagnose and fix the most common window adjustment issues — clearly, and without unnecessary jargon.
Why Proper Alignment Matters for Your Home

When your windows are out of alignment, the consequences go far beyond a sash that is slightly tough to budge. Misaligned architectural glass acts like an open invitation for drafts, moisture, and noise to invade your living space.
To understand why, we have to look at the physics of modern building materials. Frame materials, especially PVC profiles, experience significant linear expansion and contraction as temperatures fluctuate. In the heat of a humid New Jersey summer, these materials expand. In the freezing depths of winter, they contract. This continuous movement can cause microscopic shifts, slowly pulling the sash away from its optimal seating position.
When the sash shifts, your EPDM rubber seals can no longer compress evenly. This uneven pressure creates tiny gaps—often invisible to the naked eye—that destroy your home’s thermal boundary. According to the WINDOW Technical Documentation, even minor gaps around the edge-of-glass or frame regions can drastically alter the overall U-value and energy efficiency of a fenestration unit.
Properly aligned windows ensure that:
- Energy Efficiency is Restored: Eliminating drafts prevents your HVAC systems from working overtime, saving you up to 15–20% on heating costs.
- Condensation is Controlled: Drafts carry moisture-laden air. When cold outdoor air meets warm, humid indoor air at a misaligned seal, condensation forms. This can lead to mold and frame rot.
- Noise is Reduced: A tight, well-adjusted seal acts as an acoustic barrier, keeping street noise outside where it belongs.
- Hardware Lifespan is Doubled: When a window is misaligned, you have to force the handle to lock it. This puts immense strain on the hinges, corner drives, and locking cams. Regular maintenance and lubrication can extend your mechanism’s lifespan by up to 50%.
If your weatherstripping is flattened, cracked, or brittle, adjustments alone won’t solve the issue. You should consult our comprehensive Window Weatherstripping Replacement Guide to determine if it is time to replace the seals entirely before fine-tuning the hardware.
The Complete Guide to Home Window Adjustment
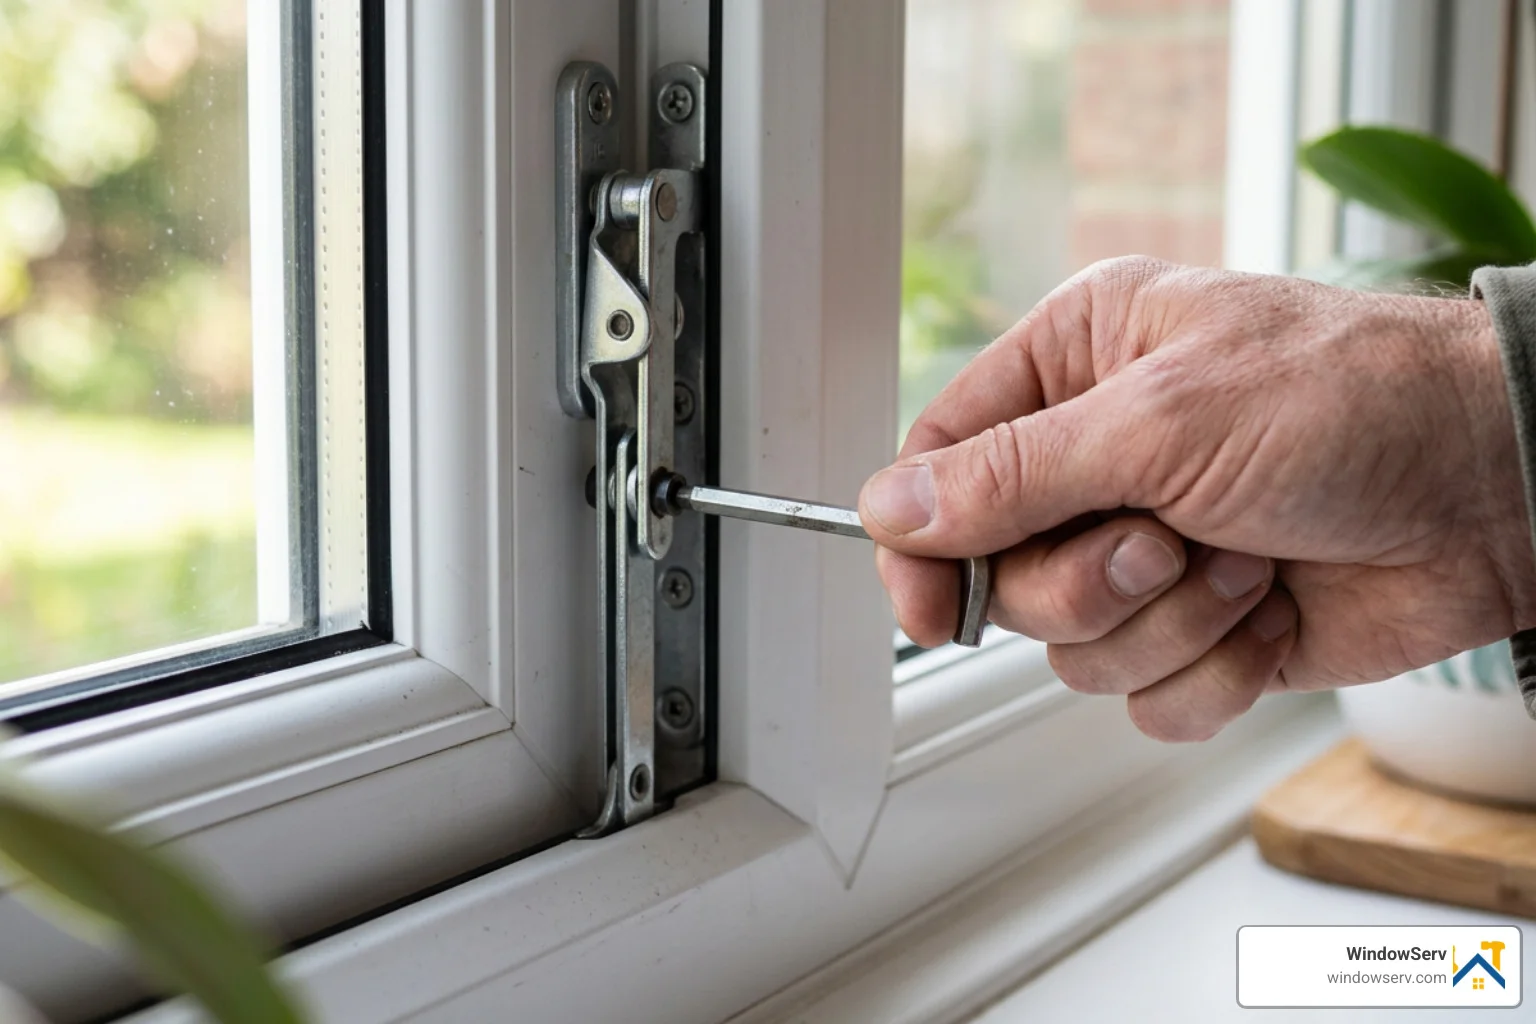
Performing a window adjustment is a straightforward DIY project if you have the right tools and approach it methodically. Before you begin, gather these essential tools:
- A 4mm Allen key (the absolute MVP of modern window hardware adjustment)
- A 2.5mm Allen key (for smaller locking cam set screws)
- A flathead and a Phillips screwdriver
- A dry silicone spray lubricant (never use petroleum-based lubricants like WD-40, as they attract dirt and clog the mechanisms)
- Safety glasses to protect your eyes from debris when working inside the frame tracks
For more details on preparing your workspace and inspecting your units, check out How to Adjust a Window: The Ultimate Guide to a Perfect Fit – INAIRSPACE.
Setting Winter vs. Summer Compression Modes
Many modern windows feature eccentric locking cams (often shaped like cylinders or octagons) located along the edge of the sash. By rotating these cams, you can increase or decrease the contact pressure (compression) between the sash and the frame.
| Feature | Winter Mode | Summer Mode |
|---|---|---|
| Compression Level | Maximum (±0.8mm tighter) | Minimum (reduced pressure) |
| Air Leakage | Zero drafts; highly airtight | Controlled micro-ventilation allowed |
| Handle Operation | Firmer, requires slightly more effort | Very smooth and easy to turn |
| Seal Wear | Higher compression on EPDM seals | Relieves pressure, extending seal life |
| Best Time to Set | Autumn (when temps drop below 15°C) | Spring (when heating season ends) |
To adjust the compression, locate the locking cams. Look closely for a small notch, dot, or marker on the cam.
- For Winter Mode: Use your Allen key or a specialized adjustment wrench to rotate the cam so the marker points toward the indoor rubber seal. This pulls the sash closer to the frame, maximizing airtightness.
- For Summer Mode: Rotate the cam so the marker points away from the seal (toward the outside). This slightly relaxes the pressure, allowing the materials to expand safely during hot summer days without binding the lock mechanism.
Step-by-Step Adjustment Procedures by Window Type
Different window styles rely on distinct mechanical systems to operate. Whether you are dealing with traditional double-hung sashes, modern European tilt-and-turn casements, or smooth-gliding sliders, the adjustment points vary.
If the glass itself is damaged or the frame is severely warped, minor hardware adjustments may not suffice, and a professional Window Repair might be necessary to restore structural integrity.
Adjusting Double-Hung Window Balance Systems
Double-hung windows rely on a balance system hidden within the side jambs to support the weight of the sash and hold it open. Over time, these balances can lose tension, causing the window to slip downward or feel incredibly heavy to lift.
- Access the Balance: Modern double-hung windows typically use spiral rod balances or block-and-tackle systems. To access them, raise the lower sash a few inches, tilt it inward by releasing the wash latches, and carefully lift the sash out of the frame.
- Inspect the Tension: For spiral balances, you will see a metal rod extending from a tube in the jamb. If your window won’t stay up, the tension is too low.
- Adjust the Tension: Use a specialized tensioning tool or a pair of thin-nosed pliers to securely grip the bottom of the spiral rod. Carefully disconnect it from its retaining shoe at the bottom of the track. To increase tension, wind the rod clockwise (usually 2 to 3 full turns is enough). Do not over-tension, as this can make the window difficult to close.
- Reattach and Test: Hook the rod back into the shoe, reinstall the sash, and test the operation. If the sash tilts or sits unevenly, you may need to adjust the tension on the opposite side to match.
For a deeper dive into diagnosing and repairing these assemblies, read our guides on Double Hung Window Balance Repair and Window Channel Balance Replacement.
Casement Window Adjustment and Hinge Calibration
Casement windows hinge at the side and crank outward. If a casement window begins to sag (known as sash drag), the bottom corner of the sash will scrape against the frame as you try to close it.
- Calculate Sash Drag: To understand how much adjustment you need, open the window fully. A helpful industry rule of thumb is that the maximum sash drag correction is proportional to your window’s width-to-height ratio multiplied by 1/16 of an inch.
- Adjust the Lower Hinge (Corner Bearing): Locate the adjustment stud on the bottom hinge arm. Using an adjustment wrench, swing the wrench toward the lock side of the window to lift the sash and decrease drag. For step-by-step manufacturer illustrations, you can reference the Casement Hinge Adjustment instructions.
- Adjust the Upper Hinge (Stay Arm): If the top of the window is sitting crooked, locate the stay arm bearing at the top. Adjusting this screw away from the lock side will pull the top of the sash closer to the hinge side, squaring the window within the frame.
- Lubricate the Tracks: Apply a thin layer of dry silicone spray to the hinge tracks and pivot points to ensure smooth movement.
If you have double-glazed uPVC or aluminum casements, you can find specific tips in our guide to Adjust Double Glazed Window Hinges.
Sliding Window Adjustment and Roller Alignment
Sliding windows rely on small roller wheels housed in the bottom of the sash to glide along a track. When these rollers wear down or accumulate dirt, the window will stick, drag, or sit unevenly.
- Clean the Track First: Before adjusting anything, vacuum the bottom track thoroughly to remove dirt, pet hair, and debris. Wipe it down with a damp cloth and apply a light mist of silicone spray.
- Locate the Adjustment Screws: Look at the bottom face or the lower sides of the sliding sash. You will find small plastic plugs covering the roller adjustment screws. Pry these plugs out.
- Raise or Lower the Sash: Insert a screwdriver into the access hole. Turning the screw clockwise will raise that side of the sash; turning it counterclockwise will lower it.
- Align Parallel to the Frame: Adjust both rollers until the vertical edge of the sash runs perfectly parallel to the side frame when the window is cracked open slightly. This ensures an airtight seal when the window is fully closed and locked.
For persistent sliding issues, refer to our dedicated Window Repair services page to troubleshoot roller replacements.
Frequently Asked Questions About Window Maintenance
Maintaining your home’s windows doesn’t have to be daunting. Here are clear answers to the most common questions we receive from homeowners in New Jersey. For broader structural issues, don’t forget to consult our Window Frame Repair Guide 2026.
How do I know if my window needs adjustment or new weatherstripping?
Perform the candle test: on a windy day, light a candle and hold it near the seams of your closed window. If the flame flickers wildly or smoke blows sideways, you have a leak.
Next, inspect the physical condition of the seals. If the EPDM rubber is soft, pliable, and springs back when pressed, it is still healthy—your issue is likely a mechanical misalignment that can be fixed with a quick window adjustment. However, if the seals are flat, cracked, brittle, or missing entirely, no amount of hardware adjustment will stop the draft. You will need to replace the weatherstripping.
What tools do I need for a typical home window adjustment?
You can handle 90% of home window adjustments with a basic, inexpensive toolkit:
- A 4mm Allen key (for casement and tilt-and-turn hinges)
- A Phillips and flathead screwdriver (for sliding roller screws and double-hung hardware)
- A can of dry silicone lubricant spray to keep the tracks sliding smoothly without attracting grit
Can improper DIY window adjustments void my manufacturer warranty?
Yes, they can. Most window manufacturers cover hardware adjustments only during the first 12 months after installation, classifying subsequent adjustments as routine homeowner maintenance.
If you attempt a DIY adjustment and accidentally strip the internal gears, force a hinge past its maximum 45-degree limit, or crack a double-glazed unit, you risk voiding the remaining warranty on those components. If you are unsure or dealing with high-end, heavy architectural glass, it is always safest to have a certified technician handle the calibration.
Conclusion
A sticky, drafty, or hard-to-lock window is rarely a sign that you need a costly replacement. Most of the time, all it takes is a precise, professional window adjustment to restore your home’s comfort, quiet, and security.
At WindowServ, we are proud to serve homeowners across New Jersey—including Bergen, Essex, Hudson, Middlesex, Monmouth, and Union counties, as well as Hoboken, Jersey City, Ridgewood, Montclair, Tenafly, Cresskill, Paramus, Summit, Westfield, and Livingston. Our local home improvement experts specialize in comprehensive restoration solutions that save your original frames, extend the life of your hardware, and deliver up to 30% in energy savings—all backed by our ironclad satisfaction guarantee.
If your windows are dragging, letting in the winter cold, or refusing to lock, don’t let a minor alignment issue turn into an expensive repair. Contact us today or visit our Window Adjustment Services page to schedule your professional calibration and bring comfort back to your home!