
Sash-ay Away: Your DIY Guide to Replacing an Upper Window Sash
What You Need to Know Before You Replace the Upper Sash on a Single-Hung Window
Knowing how to replace upper sash single hung window components can save you real money — but there's a catch most DIY guides skip right past.
Here's the quick answer:
On most modern vinyl single-hung windows, the upper sash is permanently fixed into the frame and cannot be removed on its own
Removing it typically requires taking out the entire window unit
Older wood windows are the main exception — these often use removable parting beads or stops that allow upper sash access
A small number of brands (like Viwinco) do allow targeted upper sash removal using a specific bracket-and-screw method
If your upper sash can be removed, you'll need a Phillips head screwdriver, suction cup lifter, and chisel at minimum
So before you grab your tools, the most important first step is figuring out what type of window you actually have.
Whether you're dealing with foggy glass between the panes, a failed seal, or wood rot on an older frame — the right approach depends entirely on your window's material, age, and brand.
I'm Feiruz Gabibov, COO of WindoServ, a New Jersey-based window repair and replacement company where I've overseen hundreds of single-hung window jobs — including plenty of tricky upper sash situations where knowing how to replace upper sash single hung window components (versus replacing the whole unit) made all the difference. In this guide, I'll walk you through exactly what to check, what to do, and when to call in a pro.

Understanding Single-Hung Window Anatomy
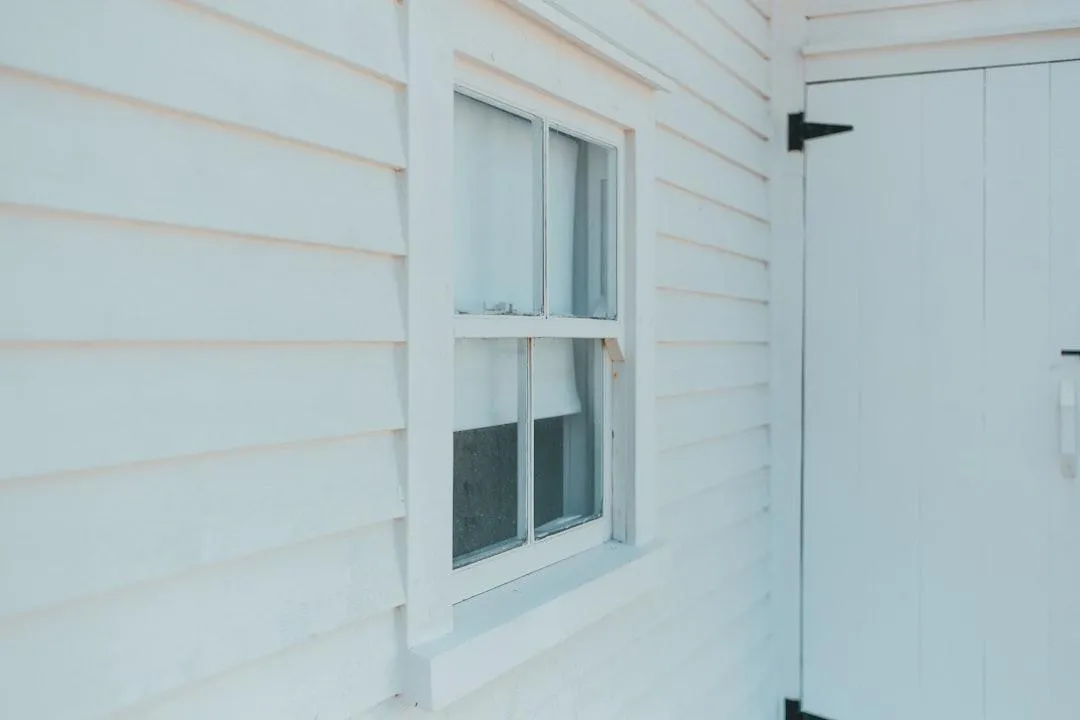
To understand if you can replace upper sash single hung window parts, we first need to look at how these units are built. A single-hung window consists of two main glass sections (sashes). In this design, the bottom sash is the "operable" one—it slides up and down and often tilts in for cleaning. The upper sash, however, is designed to stay put.

The Key Components
The Sashes: The frames holding the glass. In a single-hung, the top one is typically "fixed."
Jamb Tracks: The vertical grooves on the sides of the window frame where the bottom sash slides.
Balance System: The hidden mechanism (springs or weights) that allows the bottom sash to stay open without falling. More info about window balance repair can help if your window feels heavy or won't stay up.
The Head: The very top of the window frame.
The Sill: The bottom horizontal part of the frame.
Removable vs. Permanently Sealed
It is a common misconception that all window sashes can be popped out. In reality, the industry has shifted significantly over the years.
Feature Modern Vinyl Single-Hung Traditional Wood Single-Hung Upper Sash Mobility Permanently welded or sealed Held by removable wood stops Removal Difficulty Extremely High (often impossible) Moderate (requires prying stops) Typical Fasteners Hidden brackets or glue/welds Nails, paint, and parting beads Repair Method Full unit replacement usually required Individual sash replacement possible
Can You Remove the Upper Sash?
The short answer for most homeowners in New Jersey today is: probably not without a lot of extra work. According to industry data and modern manufacturing standards in May 2026, the vast majority of vinyl single-hung windows installed since 2000 feature an upper sash that is an integral part of the master frame.
Vinyl and Fiberglass Limitations
On most modern vinyl units, the upper sash is "pocketed" and sealed with high-strength adhesives or thermal welds. If you try to force these out, you will likely crack the main frame, leading to a much more expensive repair. For these windows, if the glass is broken or the seal has failed (causing that annoying "foggy" look), you usually have to replace the entire window unit. You can learn more about window sash replacement services to see if your specific model qualifies for a simpler fix.
The Wood Window Exception
If you live in one of the beautiful historic homes in Ridgewood, Montclair, or Hoboken, you likely have older wood windows. These are a different story! These units use "parting beads"—thin strips of wood—to create the tracks for the sashes. By carefully removing the interior stops and the parting beads, you can often free the upper sash for repair or replacement.
Identifying Your Manufacturer
Before attempting any DIY, look for a "CFR" code or a manufacturer's sticker, usually found in the top "head" of the frame or tucked into the side jamb. Brands like Andersen (100 Series) or Viwinco have specific guides. For instance, Viwinco single-hung windows are unique because they use a specific bracket system that does allow for top sash removal. If you're unsure, How to Remove and Replace a Vinyl Window Sash provides excellent visual cues for different brands.
Step-by-Step Guide to Replace Upper Sash Single Hung Window
If you have confirmed that your window brand (like Viwinco or an older wood model) allows for it, follow these steps to replace upper sash single hung window components safely.

1. Prepare the Area and Remove the Operable Sash
Clear the area around the window. Remove any window treatments. First, you must remove the bottom sash. Unlock the window, raise it about 3–6 inches, engage the tilt latches, and tilt it to a 90-degree angle. Lift it out of the balance shoes and set it aside on a soft surface.
2. Remove the Screen
Most upper sash removals require you to work from both the inside and outside. Pop the screen out to give yourself full access to the exterior tracks.
3. Disengage the Fasteners (Brand Specific)
For Viwinco-style windows: Locate the brackets on the sides of the top sash. You will typically need to remove two screws from the right-side bracket that attach to the sash, one screw from that same bracket that goes into the jamb, and one screw from the left-side bracket.
For Wood windows: Use a utility knife to score the paint along the "stop" molding. Carefully pry the molding off with a thin putty knife. Once the stops are gone, you can access the parting bead.
4. Use Suction Cups for Safety
The upper sash is heavy and has no handles. We strongly recommend using professional-grade suction cup lifters. Attach them firmly to the glass of the upper sash. This gives you a secure grip so the sash doesn't slide down and crush your fingers or shatter on the sill.
5. Extract and Clear Debris
Pull the top sash downward into the space vacated by the bottom sash, then angle it out of the frame. Once removed, use a chisel or putty knife to clear any old caulk, dirt, or debris from the tracks. This ensures the new sash will seat perfectly. For more detailed insights on the removal process, refer to the Upper Window Sash Replacement Guide.
How to measure to replace upper sash single hung window
Accuracy is everything. If you are off by even 1/8th of an inch, the window won't lock or seal.
Visible Glass: Measure the width and height of just the glass you can see.
Sash Thickness: Measure the thickness of the frame itself (usually around 1-1/2 to 2 inches).
Full Sash Width/Height: Measure from the outer edges of the sash frame.
The 1/16th Rule: Always measure to the nearest 1/16th of an inch. Measure in three places (top, middle, bottom) and use the smallest measurement.
Safety precautions for sash handling
Working with glass is inherently risky. Follow these rules to stay safe:
Gloves and Glasses: Always wear cut-resistant work gloves and safety glasses.
The Helper Principle: Never try to remove an upper sash alone. One person should hold the suction cups while the other manages the screws or stops.
Weight Awareness: Impact-resistant sashes (common in coastal areas or newer NJ builds) are significantly heavier than standard glass.
Balance Safety: Once the sash is out, the balance springs might be under tension. More info about balance spring replacement can explain how to handle these safely.
Frequently Asked Questions about Sash Replacement
When to replace upper sash single hung window vs. the whole unit?
If the frame is made of high-quality vinyl or composite and is in great shape, replacing just the sash is a cost-effective "surgical" strike.
Replace the Sash if: You have a single cracked pane, a failed seal (foggy glass), or minor rot in a wood sash.
Replace the Whole Unit if: The frame is warped, the "pocket" where the sash sits is cracked, or you're looking for a significant upgrade in energy efficiency. Replacing the whole unit can often lead to up to 30% energy savings.
What if the upper sash is permanently fixed?
This is a common headache when moving furniture. If you have a 32-inch couch and a 29-inch door, you might think, "I'll just pop the window sashes out!" If it's a modern vinyl single-hung, you're out of luck.
Alternative 1: Remove the entire window unit. This involves removing interior stops, unscrewing the frame from the house studs, and breaking the exterior caulk seal.
Alternative 2: Disassemble the door frame. Often, removing the door and the "stops" on the door frame provides more clearance than a window anyway.
How to troubleshoot stuck mechanisms?
Missing Screws: Sometimes a previous "handyman" may have used the wrong screws, causing the sash to bind. Ensure you use manufacturer-approved hardware.
Paint-Sealed Stops: In older homes in Jersey City or Tenafly, decades of paint can "glue" the window shut. Use a sash saw or a utility knife to carefully break the paint bond.
Debris: Construction dust or pet hair can clog the jamb tracks. A simple vacuuming and a spray of dry silicone lubricant can work wonders.
Conclusion
Successfully deciding to replace upper sash single hung window components depends on your ability to identify your window's construction. While modern vinyl windows often make this a "full replacement only" job, many brands and older wood styles remain repairable for the savvy DIYer.
At WindowServ, we specialize in these exact challenges across New Jersey—from Bergen to Monmouth County. Our goal is always to save your original frames whenever possible, providing a satisfaction-guaranteed service that restores your home's beauty and efficiency. If your DIY project feels like it's becoming a "DIY-Don't," our local experts in places like Paramus, Westfield, and Livingston are ready to help.
More info about professional window repair services can help you decide if it's time to put down the screwdriver and call in the experts. Whether it's a simple sash swap or a full restoration, we ensure your windows are clear, functional, and energy-efficient for years to come.
