
Understanding Window Sash Replacement and Its Benefits Window sash replacement is one of the most cost-effective ways to fix drafty, foggy, or damaged windows – without tearing out the entire
Understanding Window Sash Replacement and Its Benefits
Window sash replacement is one of the most cost-effective ways to fix drafty, foggy, or damaged windows – without tearing out the entire frame.
Here’s a quick summary of what you need to know:
Topic Key Info What is a window sash? The movable part of a window that holds the glass When to replace it Foggy glass, wood rot, broken balances, drafts, or failed seals Replace sash or full window? Sash-only replacement saves money and preserves your trim DIY or professional? Simple cases are DIY-friendly; older or complex windows benefit from a pro Typical cost range $262 – $605+ depending on material, brand, and size Energy efficiency upgrade New sashes with Low-E glass can cut energy bills by up to 30%
If your windows feel cold in winter, let in outside noise, or show foggy glass between the panes, the sash is almost certainly the problem. The good news? You likely don’t need a full window replacement to fix it.
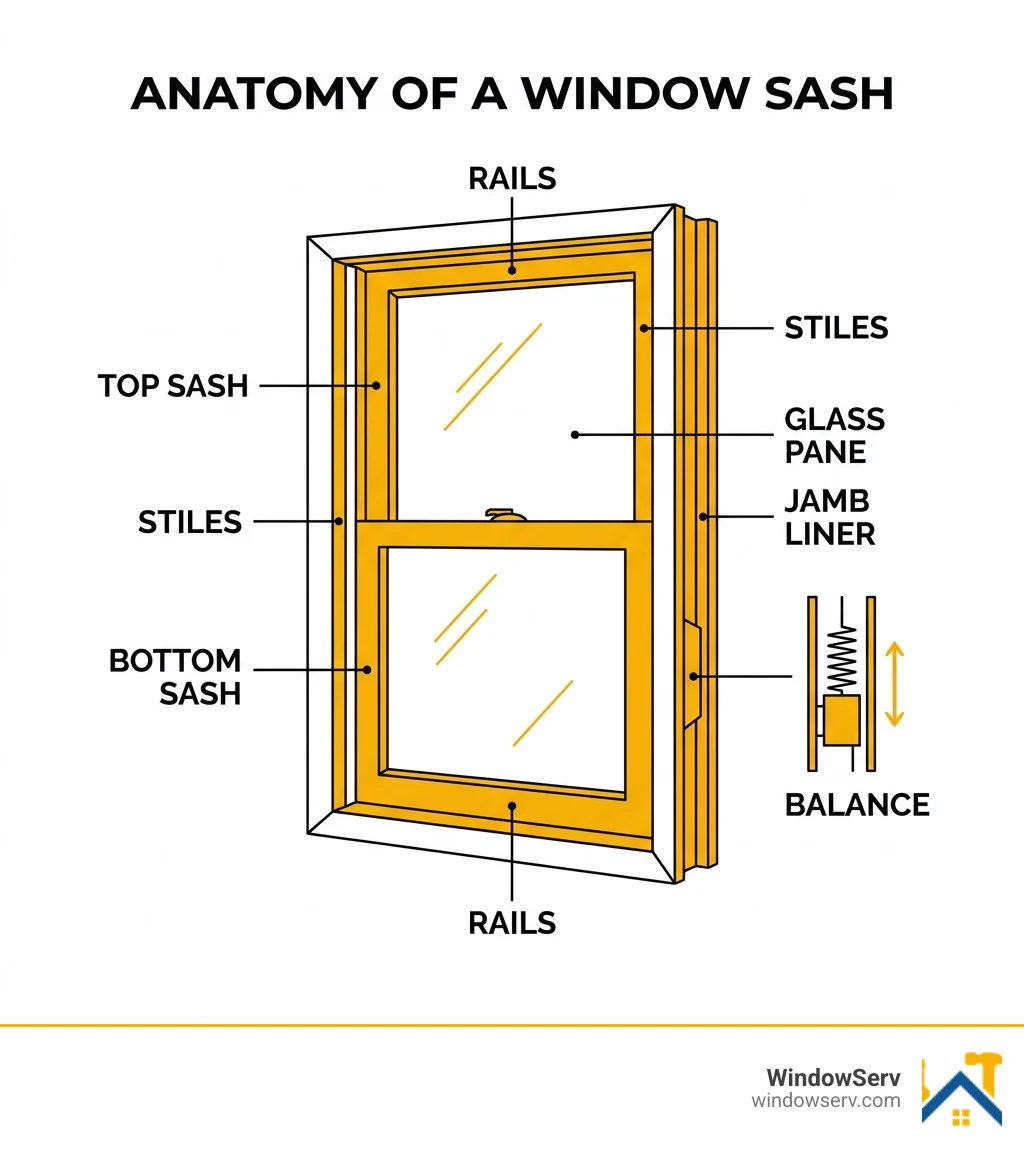
A window sash is simply the movable frame – made up of horizontal and vertical members – that holds the glass pane in place. On a double-hung window, both the upper and lower sections are sashes. When one fails, replacing just the sash preserves your existing frame, interior trim, and wall finishes – saving significant time and money.
This guide walks you through the entire process in five clear steps, from measuring your opening to testing the finished installation.
I’m Feiruz Gabibov, Chief Operating Officer of WindoServ, where I’ve overseen hundreds of window sash replacement projects across New Jersey – from historic wood-frame homes to modern vinyl installations. In this guide, I’ll share exactly what our team has learned so you can approach your own project with confidence.
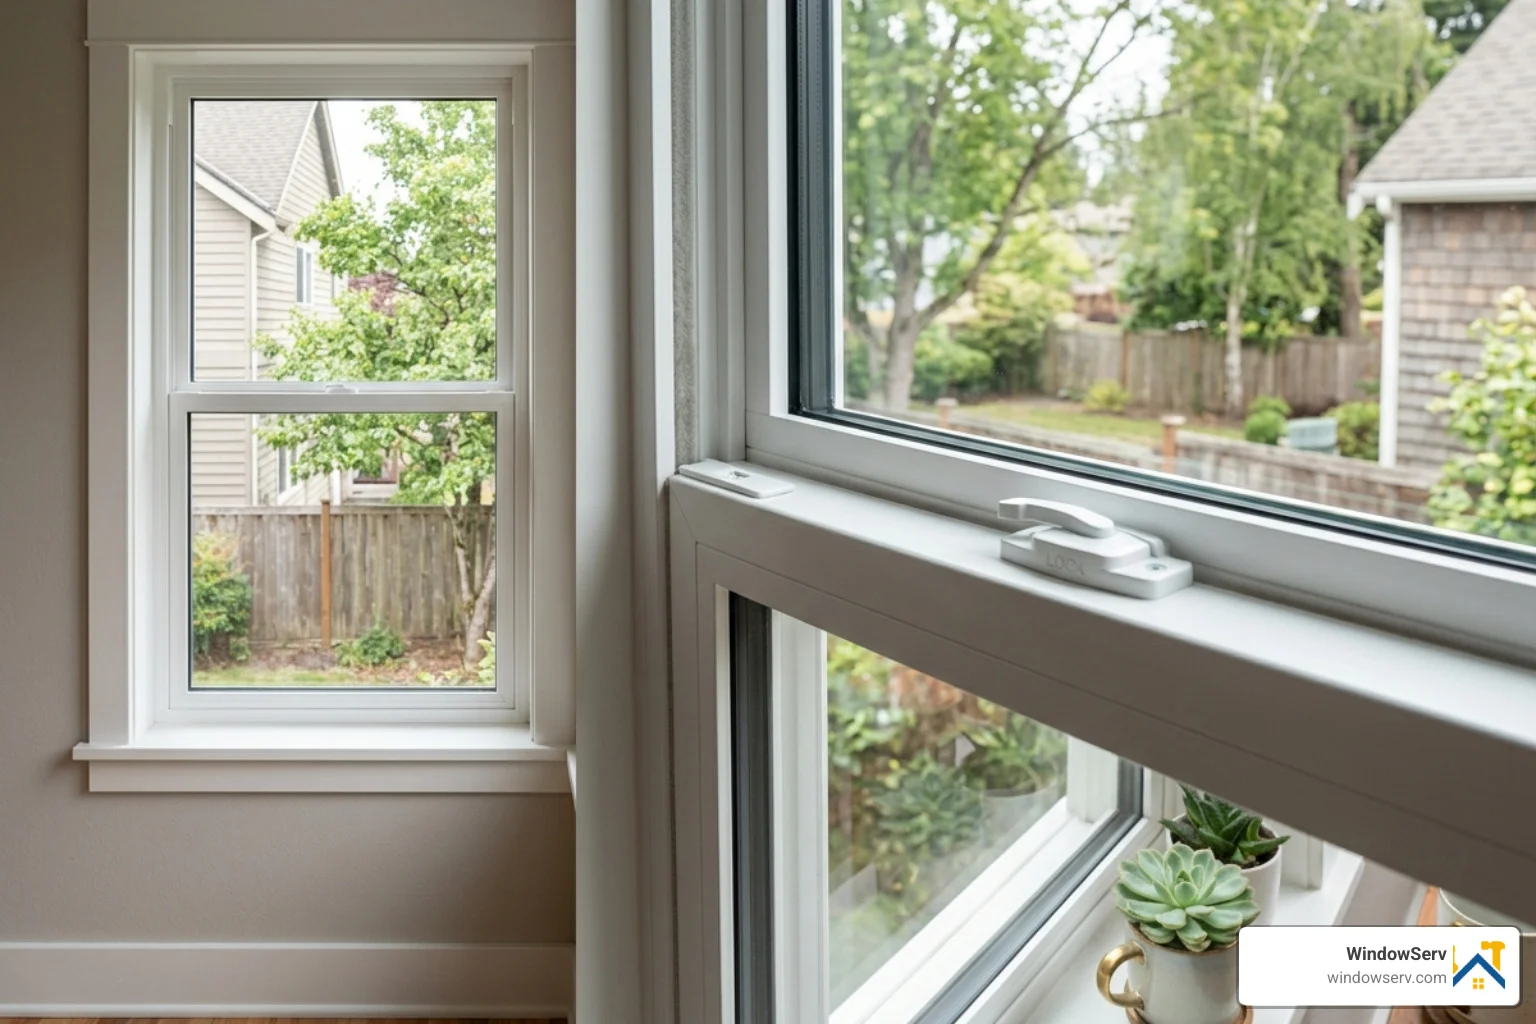
When homeowners in areas like Montclair or Ridgewood notice their windows are failing, they often assume they need a full-frame replacement. However, window sash replacement is frequently the smarter, more surgical option.
A full-frame replacement involves removing the entire window unit, including the frame and exterior casing. This often disturbs your home’s siding and interior plaster. In contrast, a sash-only replacement focuses strictly on the movable glass-holding components. By choosing this path, we help you preserve your original interior trim and avoid the mess associated with wall reconstruction.
The Financial and Thermal Edge
The benefits aren’t just aesthetic. Replacing old, drafty wood sashes with modern, energy-efficient models can lead to up to 30% energy savings. Modern sashes utilize dual-pane insulated glass units (IGUs) often filled with Argon gas and coated with Low-E (low-emissivity) film. This technology reflects heat back to its source – keeping your Essex County home cool in the summer and warm in the winter.
Furthermore, window sash restoration services are a fraction of the cost of full replacements. For example, a vinyl double-hung replacement sash might start as low as $261, while high-end wood casement sashes can reach $523 or more. By future-proofing your home with sashes that meet current energy standards, you increase property value without the $15,000+ price tag of a whole-house window overhaul.
How to Measure for Your New Window Sash Replacement Kit
Before you order a kit, you must ensure your existing frame is “square” and structurally sound. If the frame is rotting, a sash kit won’t help.
Material Durability Maintenance Best For Wood High High (Painting/Staining) Historic homes, Summit NJ estates Vinyl Medium Low Modern homes, budget-friendly Fiberglass Very High Low Extreme temperature shifts
Measuring the “Pocket”
The most critical measurement is the jamb pocket depth. For many popular systems, such as the Windsor Revive kit, you need at least 3-3/8″ of clearance between the inside stop and the outside stop.
-
Width: Measure the distance between the side jambs at the top, middle, and bottom. Use the smallest measurement.
-
Height: Measure from the high point of the sill to the top of the window opening.
-
Sill Angle: Most standard kits require a 14-degree slope. If your sill is flat or has an unusual offset, a universal kit may not fit without custom shimming.
-
Glass Size: Measure the “visible glass” (the part you can actually see through) to help verify the model series.
If you find that your window is sticking or won’t stay up, you might also need our window balance repair service to ensure the new sash operates smoothly. For a guaranteed fit, you can always refer to our WindowServ measurement guide for sash replacement.
Identifying Your Series for Window Sash Replacement
Manufacturers don’t make “one size fits all” sashes. To get an exact-fit part, you need to identify the window series.
-
Manufacturer Stamps: Look at the corner of the glass for a logo (like Andersen, Pella, or Silver Line).
-
Glass Etchings: Often, a small code in the corner of the glass will indicate the production date and glass type.
-
Hardware Marks: Check the locks or the “keepers” for model numbers.
-
Production Era: For instance, Andersen 200 Series Narroline windows were produced from 1968 to 2012. Knowing the year your home was built or renovated can narrow down the search significantly.
Step-by-Step Guide: How to Replace Window Sashes
Installing a new sash is surprisingly fast. In fact, many industry pros joke that you can finish the job before a pot of coffee is done brewing.
Tools Needed:
-
Phillips head screwdriver
-
Flathead screwdriver
-
Safety gloves
Step 1: Unwrapping and Inspection
Carefully unwrap your new sash. Verify that the dimensions match your order and that the glass is intact. Check for the “lift rail”—this handle-like lip always faces the interior of your home.
Step 2: Tilting and Clip Removal
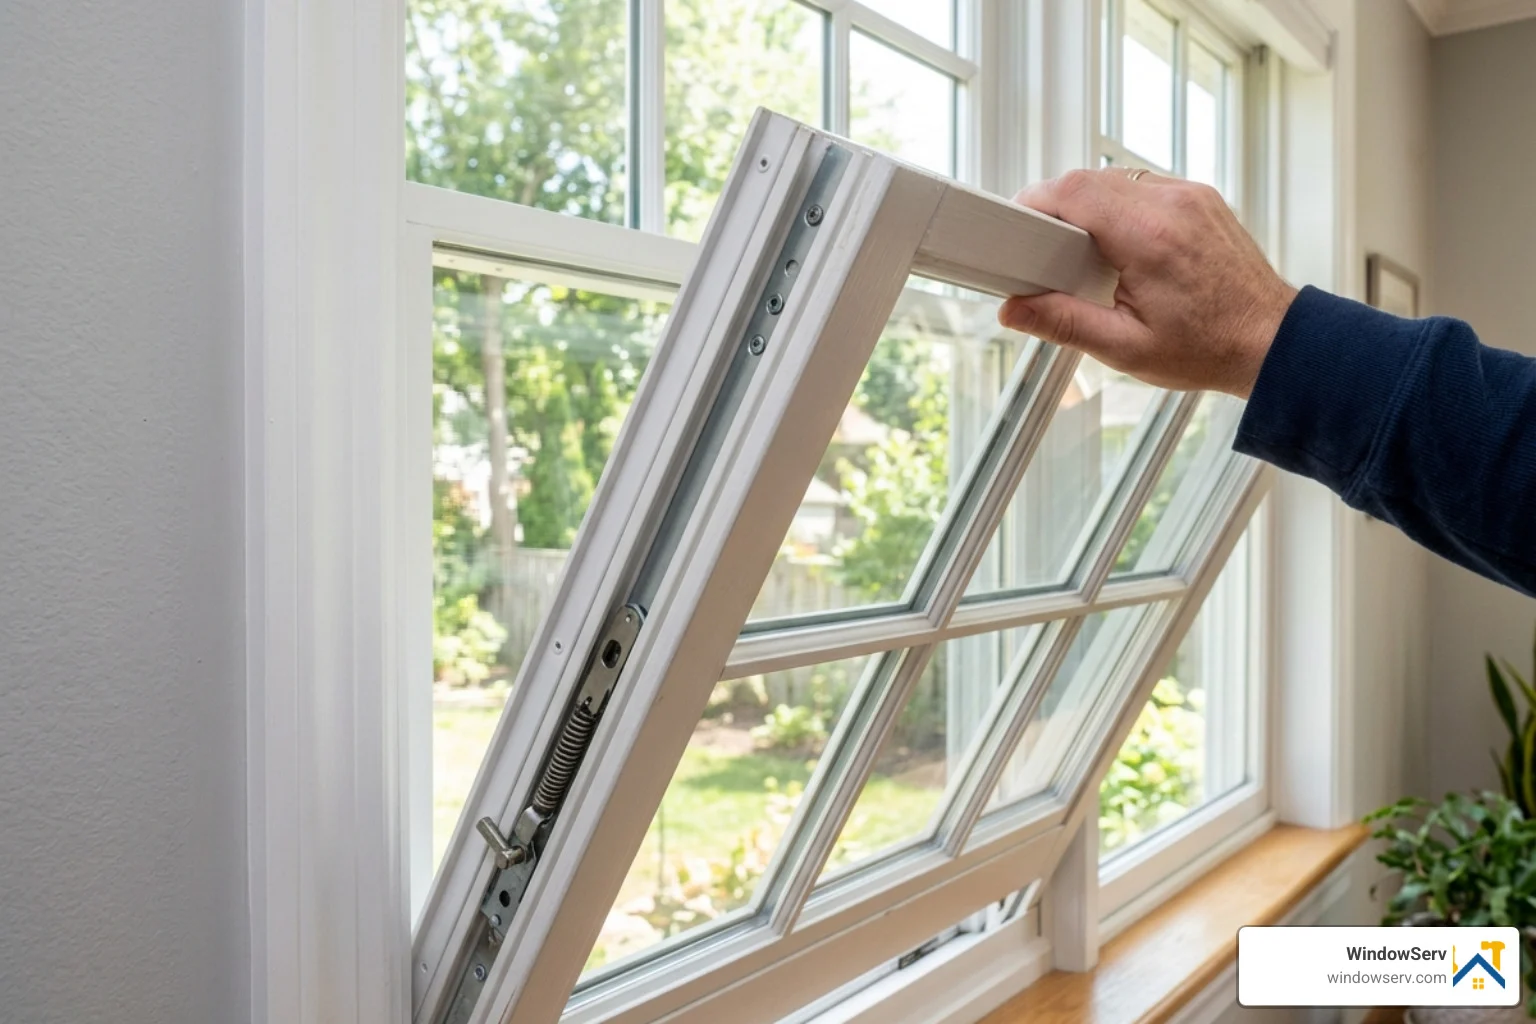
Unlock your window and raise the bottom sash about 3 to 4 inches. Engage the tilt latches (usually located on the top rail of the sash) and tilt the window inward to a 90-degree angle. If your window uses black plastic clips on the side jambs, use your Phillips screwdriver to remove them.
Step 3: Removing the Old Sash
While holding the sash at a 90-degree angle, lift one side to disengage the metallic pins from the balance shoes (the U-shaped clamps in the tracks). Once one side is free, the other will slide out easily. If you are replacing both sashes, always remove the bottom one first, then the top.
Step 4: Seating Metallic Pins into U-Shaped Clamps
Take your new sash and hold it horizontally. Insert the metallic pins on the sides of the sash into the U-shaped balance shoes in the window tracks. Ensure they are seated firmly.
Step 5: Testing Operation and Locking
Tilt the sash back up into the operating position until you hear a “click.” Slide the window up and down several times. It should move smoothly and stay in place when you let go. Finally, lock the window to ensure the meeting rails are properly aligned. If the window won’t lock, ensure the top sash is pushed all the way up into the header.
If you encounter resistance or the frame seems warped, our professional window repair services can help align the components perfectly.
Common Challenges in Window Sash Replacement
Even with a “5-minute” install, challenges can arise:
-
Jamb Liner Compression: If the new sash is too tight, the vinyl jamb liners may need to be adjusted or lubricated with a silicone spray.
-
Balance Spring Tension: If the sash feels heavy or slams shut, you may need a double hung window balance spring replacement.
-
Misaligned Locks: If the lock and keeper don’t line up, the sashes may not be fully seated in their tracks.
-
Weatherstrip Friction: New weatherstripping can be stiff. This usually improves after a few days of use.
For homeowners who prefer a “done-for-you” approach, we offer WindowServ professional sash installation in NJ, covering everything from Middlesex to Bergen County.
Material Options and Specifications
When selecting your window sash replacement, the material should match your home’s architectural style and your maintenance appetite.
-
Primed Wood: Best for historic restorations in Jersey City or Hoboken. These arrive ready for you to paint to match your existing trim.
-
Aluminum Clad: Offers the beauty of wood on the inside with a durable, weather-resistant aluminum shell on the outside.
-
Cellular PVC: Rot-resistant and insect-proof, making it ideal for the humid Jersey Shore environment in Monmouth County.
-
Vinyl: The most economical choice, offering great thermal performance with zero painting required.
Most reputable manufacturers provide a 10-year to 20-year limited warranty on the glass and sash components. Be aware that custom wood reproductions can have lead times of 8 weeks or more, so plan your project accordingly.
Frequently Asked Questions about Sash Restoration
Can I replace just the upper or lower sash?
Yes! If a baseball breaks the lower pane but the top is fine, you can order just the bottom sash. However, keep in mind that many “universal kits” are sold as a pair to ensure the weatherstripping and locks match perfectly. To identify them, remember: the bottom sash has the locks, and the top sash has the “keepers.”
Are there universal sash kits that fit multiple brands?
Yes, products like the “Quiksash” system are designed to retrofit into various wood window frames that use vinyl compression jamb liners. These are excellent for brands that are no longer in business. Our WindowServ repair specialists often use these to save windows that other companies would insist on replacing entirely.
How do I know if my window balances need replacing too?
If your window is difficult to open, makes a “popping” sound, or falls down like a guillotine, your balances have failed. The balance is the hidden spring mechanism that counteracts the weight of the sash. We provide expert window balance replacement in NJ to restore that “weightless” feel to your windows.
Conclusion
Window sash replacement is a powerful way to upgrade your home’s efficiency and appearance without the headache of a major construction project. Whether you are looking to preserve the historic charm of a Livingston Victorian or simply want to stop the drafts in your Westfield colonial, focusing on the sash is the most efficient path forward.
At WindowServ, we specialize in these surgical repairs. We are local NJ experts serving Hudson, Essex, Union, and beyond. We stand behind our work with a satisfaction guarantee and the promise of up to 30% energy savings by restoring your windows to peak performance.
Ready to see clearly again? Explore our full range of window replacement services or contact us today for a professional consultation in your New Jersey home.