
Replacing a Sash Cord: The Ultimate DIY Guide to Smooth Windows
When a Sash Window Stops Working, a Broken Cord Is Usually Why
Replacing a sash cord is one of the most common — and most manageable — repairs you can make on an older double-hung window. If your window suddenly drops when you let go, won't stay open, or you can hear a weight thudding inside the frame, a broken cord is almost certainly the cause.
Here's a quick overview of what the repair involves:
Remove the staff beads and lift out both sashes
Access the weight pockets inside the frame
Measure and cut new cord to the correct length
Thread the cord through the pulley using a sash mouse or weighted string
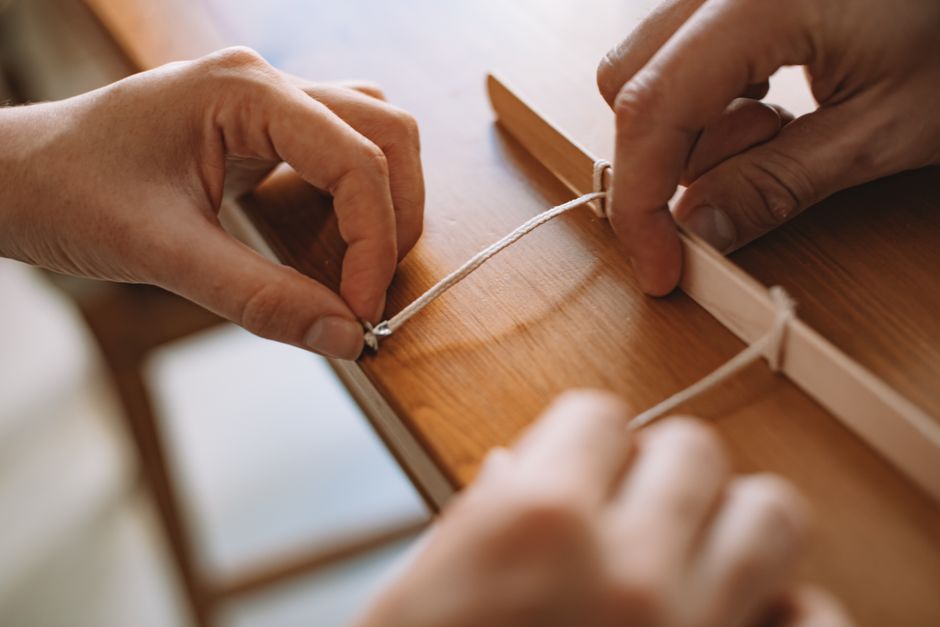
Tie the cord securely to both the sash and the counterweight
Reassemble the window and test for smooth, balanced operation
It sounds involved, but most homeowners with basic DIY skills can complete the job in a few hours. Materials typically cost under £10–£50, compared to £160–£250 for a professional call-out.
Sash windows have been using the same rope-and-pulley counterbalance system since the 17th century. The design is simple and reliable — but the cords do wear out over time. In some historic homes, the original cords lasted well over a century before needing replacement.
I'm Feiruz Gabibov, COO of WindoServ, and through overseeing hundreds of window repair projects across New Jersey, replacing a sash cord is one of the repairs I see homeowners tackle successfully with the right guidance. In this guide, I'll walk you through exactly how to do it, step by step.

Why Do Sash Cords Break and Why Act Quickly?
A traditional timber double-hung window is a beautifully engineered system of balances. Inside the hidden hollow chambers of the window frame, heavy counterweights suspend the upper and lower sashes, allowing you to open them with the touch of a finger. However, this effortless movement relies entirely on the strength of the sash cords.
Over the decades, several factors contribute to cord failure:
Wear and Tear: Simple friction from years of opening and closing gradually frays the braided fibers.
Paint Buildup: Well-meaning paint jobs often coat the cords. Dried paint makes the cord stiff, brittle, and prone to snapping as it bends over the pulley.
Moisture and Wood Rot: Rainwater can seep into the sash channels, leading to mold, mildew, and decay of both the cord fibers and the surrounding timber. If your window frame has suffered from moisture damage, you may also need to look into wooden sash window repairs to stabilize the frame before re-cording.
Ignoring a frayed or broken sash cord is a recipe for bigger problems. When one cord snaps, the remaining cord on the opposite side of the sash must bear double the weight. This accelerates its wear, leading to sudden failure.
A falling window sash is highly dangerous; a heavy timber frame crashing down can shatter historic glass or cause serious injury to hands and fingers. Furthermore, unbalanced sashes sit crookedly in their frames, creating gaps that allow drafts, moisture, and cold air to enter your home, driving up your energy bills.
Essential Tools and Materials for Replacing a Sash Cord
Before you begin, gather your tools and materials to ensure a smooth, uninterrupted project. Having the right gear on hand is the key to avoiding frustration.
What You Will Need
Waxed Cotton Sash Cord: We highly recommend traditional waxed cotton cord (usually size #8 or 8mm for standard residential windows). The wax coating resists moisture and helps the cord glide smoothly over the pulleys.
Sash Mouse: A small, flexible lead weight attached to a piece of twine. This is used to fish the new cord down through the dark cavity of the frame.
Flat Pry Bar & Chisel: Essential for gently prying away the wooden trim beads without splitting the historic wood.
Utility Knife: Used to score paint lines so you don't tear the paint off your walls or trim.
Hammer & Panel Pins (40mm): To reattach the wooden beads during reassembly.
Screws or Clout Nails: To secure the new cord inside the sash groove.
Candle Wax: A time-tested, traditional lubricant for the pulleys and sash channels.
Safety Gear: Safety goggles, heavy gloves, and a dust mask (especially important when working around old paint).
For more insight into traditional window construction, you can consult How To Replace Window Sash Cords - This Old House or explore our comprehensive wood window restoration guide.
Comparing Cord and Chain Materials
Material Type Average Lifespan Pros Cons Best For Waxed Cotton Cord 15–25 Years Traditional look, quiet operation, resists moisture, easy to knot Will eventually wear out and stretch slightly Period-correct historic restorations Synthetic Nylon/Polyester 20–30 Years Highly durable, does not rot Slippery to knot, stretches over time, looks out of place in older homes Modern utility windows Sash Chain (Bronze/Steel) 50+ Years Virtually indestructible, will not break under normal use Distinctive metal-on-metal clank, expensive, difficult to install Extremely heavy sashes or high-traffic areas
Step-by-Step Guide to Sash Window Disassembly and Re-Cording
Replacing a sash cord requires a methodical, step-by-step approach. Do not rush the disassembly process; older wood can be brittle, and protecting your window frame is essential.
First, prepare your workspace. Lay down heavy dust sheets to protect your floors from paint chips, dust, and old weights. Put on your safety goggles and let's get started.
Step 1: Removing the Staff Beads and Sashes
The staff bead is the decorative wooden trim that frames the window opening on the inside, keeping the lower sash in place.

Score the Paint: Use your utility knife to carefully slice through any paint seals along the seam where the staff bead meets the window casing. If you skip this, prying the bead off will rip large chunks of paint and plaster from your walls.
Pry the Staff Bead: Insert your flat pry bar behind the staff bead, starting near the middle. Gently pry outward. Work your way up and down the bead slowly to avoid snapping the wood. Once removed, pull out any old panel pins from the bead and set it aside safely.
Remove the Lower Sash: With the staff bead out of the way, the lower sash can swing free. Carefully pull it toward you. Cut the remaining lower sash cords (hold onto the sash firmly so it doesn't drop) and gently lower the weights down into the pockets. Lift the lower sash out of the frame and place it safely out of the way. If you find your window balances are damaged beyond the cords, check out our guide on double hung window balance repair.
Remove the Parting Bead: The parting bead is the thin strip of wood that sits in a groove between the lower and upper sashes. Use your pliers or a chisel to gently pull it straight out of its channel.
Remove the Upper Sash: Once the parting bead is removed, the upper sash can be pulled forward, its cords cut, and the sash removed from the frame.
Step 2: Accessing the Weight Pockets
With both sashes removed, look at the lower half of the inner frame channels (the jambs). You will see a small, rectangular wooden panel on each side. These are the pocket covers.
Unscrew or Pry the Covers: Pocket covers are usually held in place by a single screw or are simply wedged tightly into the frame. Remove the screw or use your chisel to carefully pop the cover out.
Retrieve the Weights: Reach inside the dark cavity. You will find the heavy cast iron or lead weights resting at the bottom of the cavity floor. Pull them out through the pocket opening.
Identify the Weights: Keep track of which weight came from which side and whether it belonged to the inner (lower) or outer (upper) sash. The weights for the upper and lower sashes are often different sizes because the sashes themselves have different weights due to glass and timber dimensions.
Step 3: Measuring and Cutting the Cord When Replacing a Sash Cord
Getting the cord length correct is critical. If the cord is too short, the sash won't close all the way; if it is too long, the weight will hit the bottom of the cavity floor before the window is fully open, leaving the window unbalanced.
To calculate the perfect length:
Measure the entire window opening from the sill up to the very top of the pulley.
Add six inches (150mm) to this measurement to account for the knots on both ends.
If you want to double-check using the old cord, you can read more technical tips on Replacing cords on sash windows.
Step 4: Tying the Knots and Attaching the Weights
Now it's time to connect your new cord to the weights and sashes.

Attach to the Weight: Pass the end of the new cord through the eyelet at the top of the sash weight. Tie a secure, self-tightening knot, such as a figure-eight knot or a pretzel knot. Pull it tight to ensure it cannot slip through the weight's eyelet.
Place the Weight Back: Drop the weight back into the pocket.
Attach to the Sash: Pull the cord taut until the weight is suspended about two inches (50mm) off the cavity floor when the sash is in its fully closed position.
Secure the Cord in the Sash Groove: Older sashes have a groove cut into their sides with a circular pocket at the end. Fit the cord into this groove and tie a small knot at the end to sit in the pocket. Secure the cord inside the groove using clout nails or short, flat-head drywall screws. Make sure the screw heads sit completely flush with or below the timber surface so they don't scrape against the window frame.
Step 5: Threading and Replacing a Sash Cord Through the Pulley
To get the new cord up and over the pulley and down into the weight pocket:
Use the Sash Mouse: Tie the twine of your sash mouse to the end of your new sash cord.
Drop the Mouse: Feed the weighted lead mouse over the top of the pulley wheel. Let gravity pull the mouse down through the hollow frame cavity until it appears at the bottom pocket opening.
Pull the Cord Through: Reach into the pocket, grab the mouse, and pull the twine through until the new sash cord follows.
Lubricate the Pulley: While you are here, rub some traditional candle wax or spray a bit of dry silicone lubricant onto the pulley axle to ensure quiet, squeak-free window adjustment.
Step 6: Reassembling and Testing the Window
With the new cords securely attached to both the weights and the sashes, it's time to put your window back together.
Position the Upper Sash: Lift the upper sash into place, feeding the cords into its side grooves. Push the sash back into its outer track.
Reinstall the Parting Bead: Tap the parting bead back into its groove. If it feels loose, use a few tiny panel pins to hold it in place.
Position the Lower Sash: Lift the lower sash, attach its cords, and place it in the inner track.
Test the Travel: Before nailing the staff beads back on, slide both sashes up and down. They should move smoothly, hold their positions perfectly, and meet the sill and top jamb flush.
Reinstall the Staff Beads: Position the staff beads and secure them with 40mm panel pins. Do not drive the pins too close to the corners to prevent splitting.
Apply Weatherstripping: If you want to maximize your energy savings, this is the perfect time to install new draft seals. Learn how in our window weatherstripping replacement guide.
DIY vs. Professional Sash Cord Replacement Costs
Is replacing a sash cord a project you should tackle yourself, or should you call in the local experts at WindowServ? Let's break down the costs, time, and effort required.
Cost Comparison
DIY Approach: If you already have the basic tools (pry bar, hammer, chisel), a hank of high-quality waxed cotton cord and some panel pins will cost you under $15 to $50 total.
Professional Call-Out: Hiring a specialist to replace sash cords typically ranges from $150 to $300 per window, depending on the size of the window and whether both the upper and lower sashes need re-cording.
Is DIY Right for You?
While the material savings are substantial, you must factor in your time and comfort level. A single window can take a beginner 2 to 3 hours to complete. If you have a historic home in Montclair, Ridgewood, or Hoboken with a dozen drafty windows, the project can quickly consume several weekends.
Additionally, working on upper-story windows requires safety at height. If your sashes are extremely heavy, have broken glass, or the surrounding timber frame shows signs of severe decay, DIY repair can be risky. In these cases, consulting a professional ensures your historic windows are preserved safely and correctly. For more details on full window restoration, read our window sash replacement guide 2026.
Frequently Asked Questions about Sash Window Maintenance
Can I replace a sash cord without removing the sashes?
No. While some internet "shortcuts" suggest you can thread a cord with the sashes in place, this rarely works. To properly set the cord length, tie secure knots, and ensure the weights do not crash into the bottom of the cavity, you must remove the sashes and access the weight pockets. Taking the time to disassemble the window properly is the only way to achieve a balanced, smooth-gliding window.
How long do traditional cotton sash cords last?
High-quality waxed cotton sash cords typically last 15 to 20 years under normal operating conditions. Modern synthetic fibers can last slightly longer, but they are prone to stretching, which can throw off the balance of your weights. Regular maintenance, such as keeping the sash tracks clean and avoiding painting over the cords, will maximize their lifespan.
What size sash cord do I need for standard windows?
Most standard residential double-hung windows use size #8 (1/4 inch or 8mm diameter) sash cord. This size fits standard pulley grooves and is strong enough to support sashes weighing up to 30 lbs. For exceptionally large or heavy commercial and historic sashes, a 10mm (#10) cord may be required.
Restore Your Windows to Perfection with WindowServ
If your historic timber windows are sticking, drafty, or suffering from broken cords, you don't have to tackle the job alone. At WindowServ, we are proud to be the local window restoration experts serving homeowners throughout New Jersey — including Bergen, Essex, Hudson, Middlesex, Monmouth, and Union counties.
Our experienced team specializes in preserving original frames, restoring smooth operation, and delivering up to 30% energy savings through precision repairs and draft-proofing. We back all of our work with a satisfaction guarantee.
Whether you need a single cord replaced in Hoboken or a complete historic restoration in Tenafly, we are here to help. Contact us today to explore our window sash replacement services and schedule your professional assessment!
